






News
Temple Assault: Attacking & Defending on Temple of Anubis ft. ToxikeN

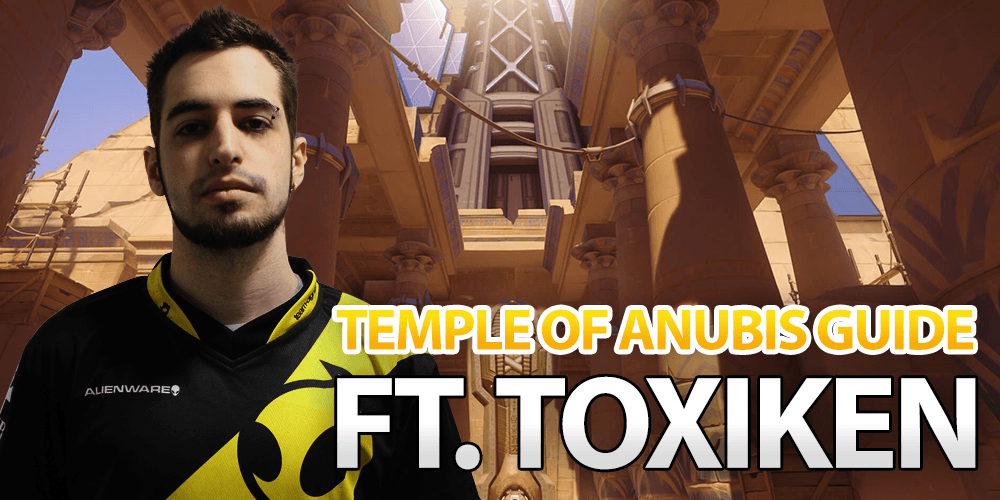
This article was written with input from Team Dignitas flex player, Joshua ‘ToxikeN’ Campos.
With a combination of narrow choke points and verticality, Temple of Anubis is an elaborate Assault map. This guide will take a look at assaulting and defending on Temple of Anubis, detailing strategies, positioning, and hero selection.
There’s a steep difficulty hike between assaulting the first and second points. Excluding the main choke, Point A heavily favours the attacking team, with various paths and flank routes for attackers to utilize. On the contrary, Point B is so closely positioned to the defender’s spawn that it becomes difficult to capture if the defending team isn’t wiped instantly.
Point A
Attacking
[Click images for full-size]
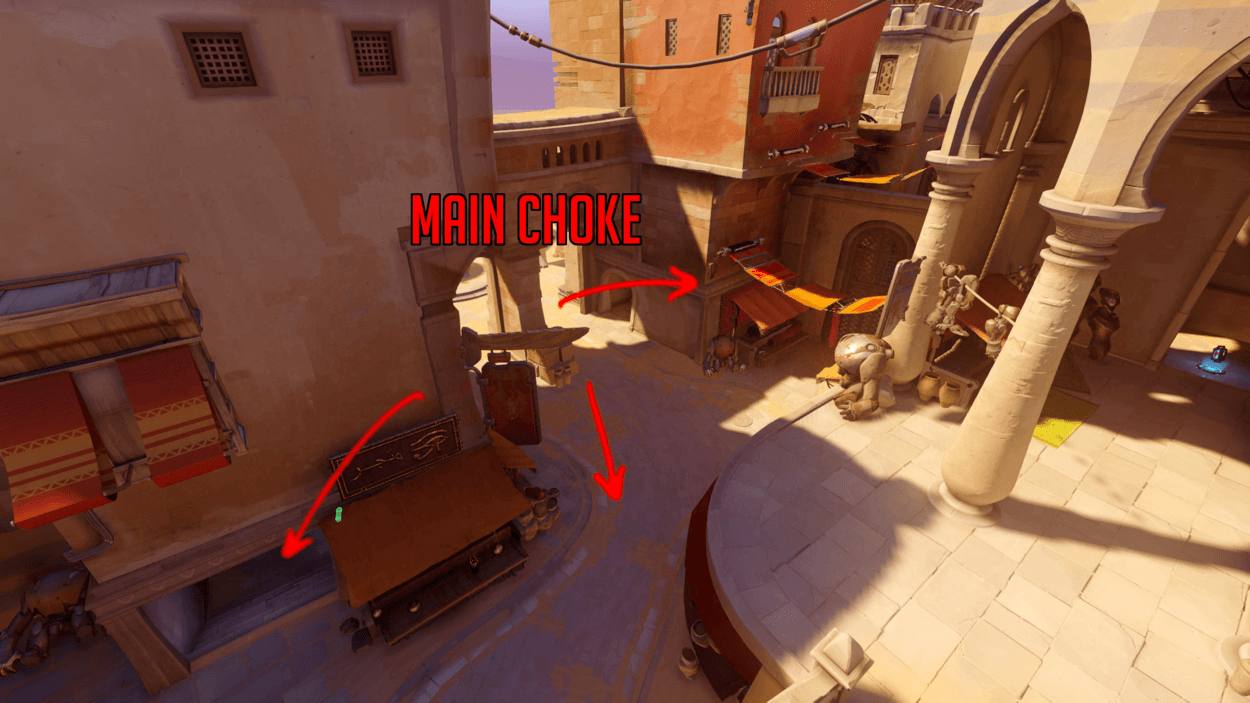
Point A has several paths branching from one central choke, from which many approaches can be taken. Dive compositions are particularly strong on Point A, and heroes like Genji, Tracer, Pharah/Widowmaker and Winston work well together when pushing onto the point. You can set up Genji and Tracer flanking from the left and right sides of the point, Widowmaker atop the arch at the main choke, and the rest pressuring through main (the central path). This is a strong way to pressure the point, and Widowmaker will have free reign to pick off the opposing team. Overall, dive compositions that employ flanking alongside a centralized push are a powerful way to attack Point A.
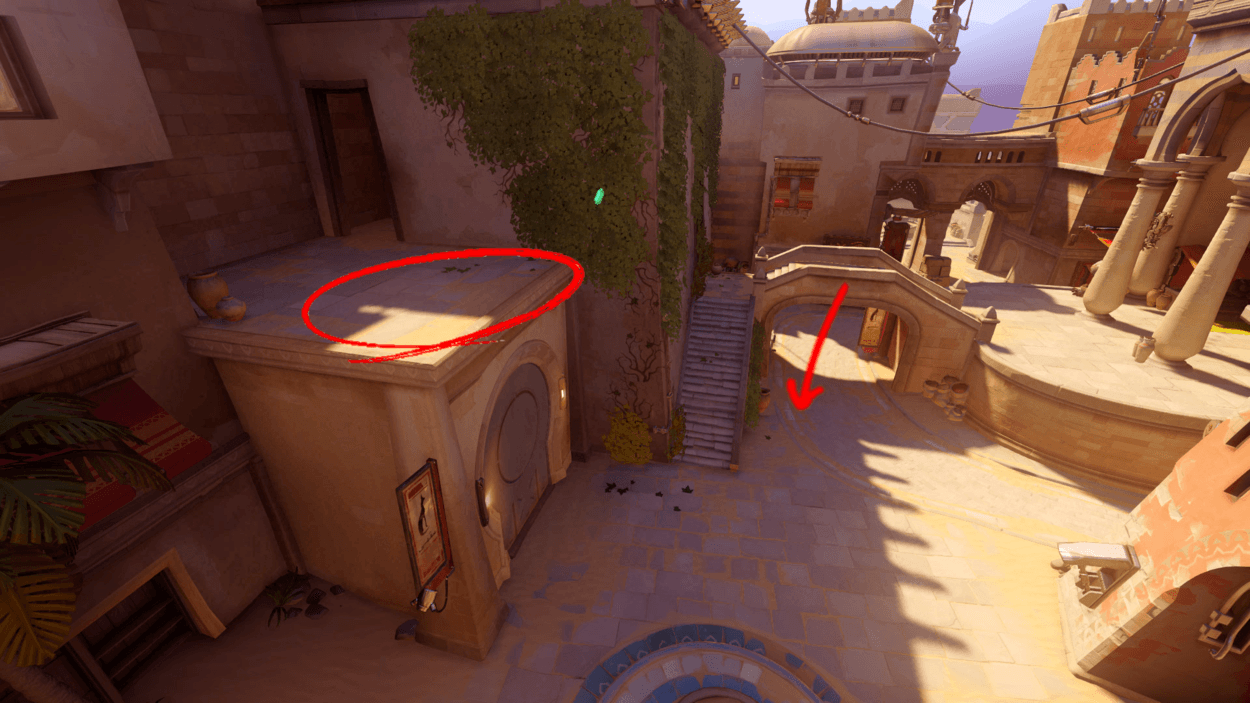
Another effective strategy is to move together with a tank-heavy composition (e.g. a triple-tank setup) and attempt direct, brute-force pushes towards the point. Pair this with an Ana and a DPS like Soldier: 76, pushing to the high ground overlooking Point A to lay down fire and healing from above.
Defending
A tanky composition is the best setup to hold the first point. Having a Reinhardt paired alongside a Zarya and Roadhog is strong, alongside the standard Ana and Lucio. The final hero pick can either be a DPS, or even a fourth tank like Winston.
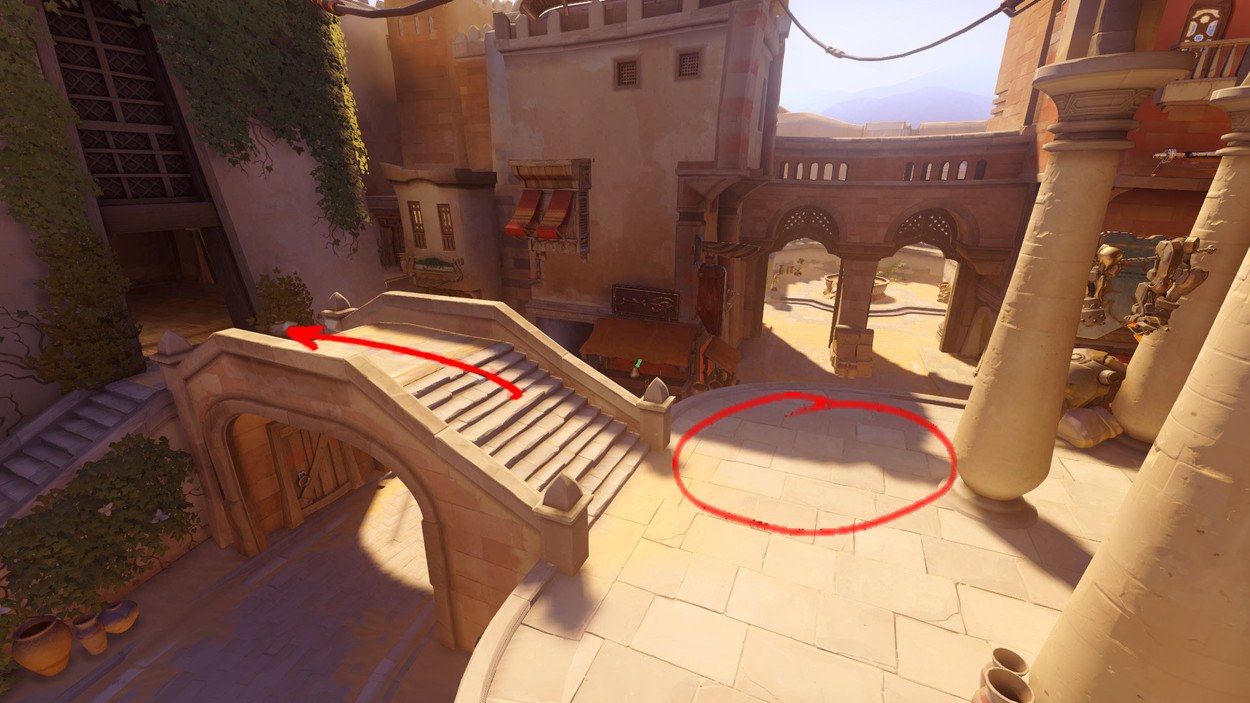
The circle highlighted above is the standard position for tanks to hold. In response to dives, you can back off across the bridge and retreat into the side room to the left. If the opposing team pushes on and sends someone to contest the point, gather your bearings inside the room, let your Reinhardt’s shield recharge, and proceed to defend the point together.
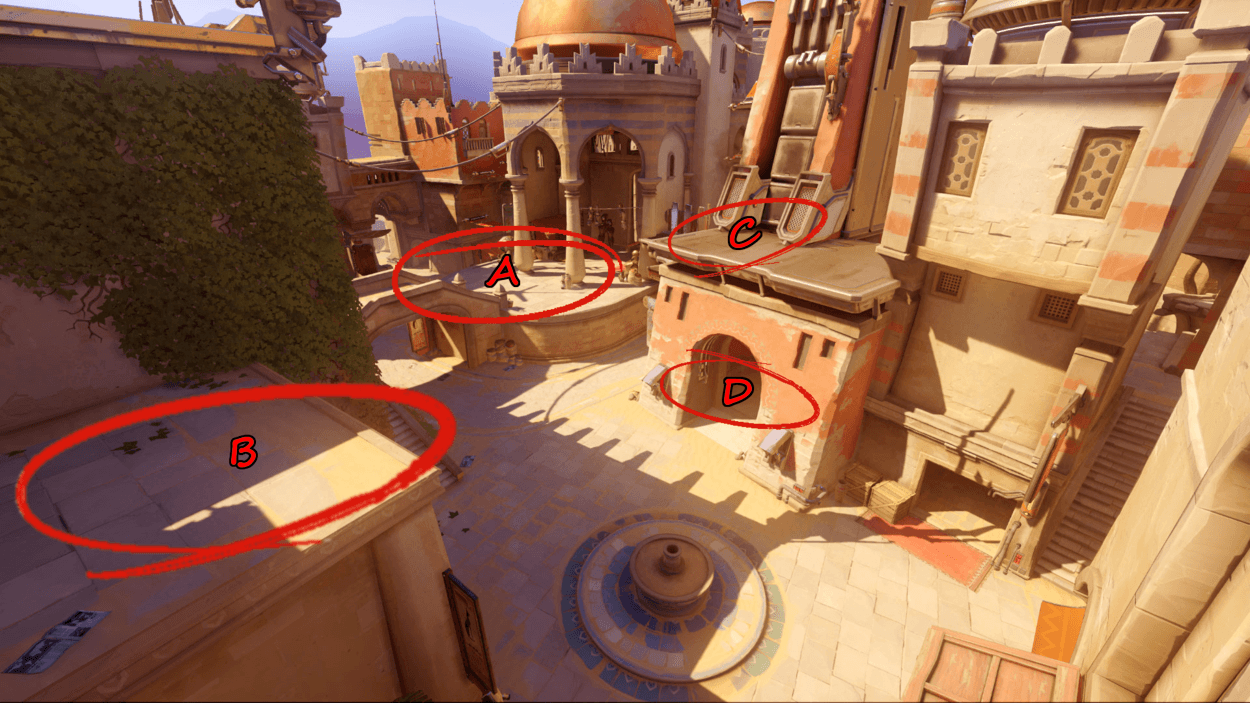
Pictured above are some of the best positions to hold. Typically, tanks will be set up around A, long-range hitscan heroes like Soldier: 76 and Widowmaker should set up at B and C. Utilizing the high ground around the point will greatly aid in your defense. D is an ideal room to retreat to when defenses turn sour, and is a secure place to recuperate and heal up. It’s also effective shelter against a Widowmaker perched on the choke archway.
Point B
Attacking
To push through the narrow, enclosed structure of Point B, a standard triple-tank composition is effective. Tracer is a particularly strong choice of DPS here, as she benefits in this close-range environment, where she can flank hard and break line-of-sight easily.
Point B is a difficult point to attack due to the generous placement of the defending team’s spawn. Therefore, coordinated strikes are crucial to success. The best approach is to stack and combo ultimates together, as you’ll be looking to burst down the opposing team simultaneously. Thoughtful ultimate management and communication become key factors, and single picks and staggered engages are far less effective at this point. Poor engages will result in the defending team contesting the point for a prolonged period, slowly whittling down and negating attackers by trickling onto the point from the nearby spawn room.
Look to make some pushes while holding onto your ultimates, building up ultimate charge while trying to force your opponents to use theirs. Look to stack 5 or 6 ultimates, and engage with everything while you have the ultimate advantage.
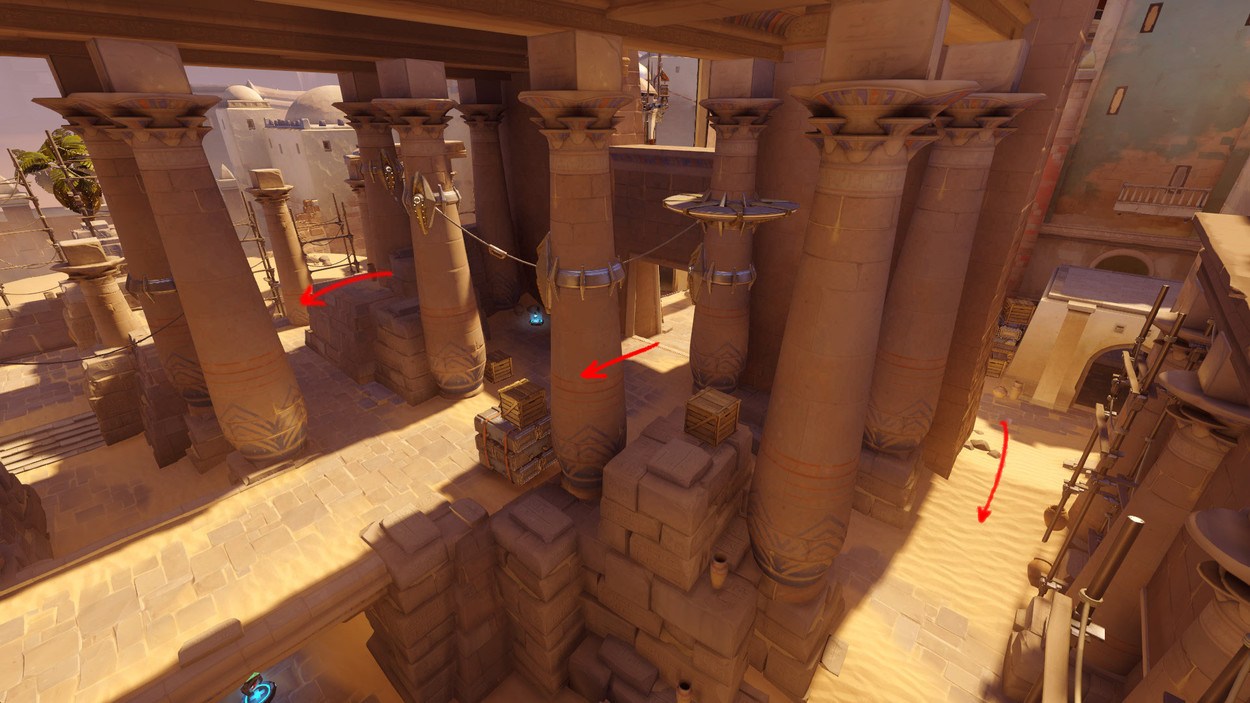
Another effective strategy is to commit to a particular route, and engage from the side rather than through the middle route. Flankers can work well, and it’s good to have a Tracer or Genji maintaining pressure on the side routes, while Ana or a hitscan DPS lays down fire from the central entrance/bridge.
Situationally, it’s possible to snowball a lead from Point A and translate it into a full or partial capture of Point B. This can take place when you’ve executed a wipe of the defending team within the first couple of pushes on Point A, without burning ultimates. In cases like these, look to capitalize on your Ultimate charge advantage by pressuring Point B immediately, initiating and comboing a Graviton Surge or Earthshatter before the enemy team has a chance to catch up.
Defending
Triple-tank setups continue to be effective here. McCree’s a strong choice on this point, particularly in response to a Tracer pick. Moreover, Pharah has many pillars and elevated platforms to pivot around, enabling her to lay down fire with relative safety.
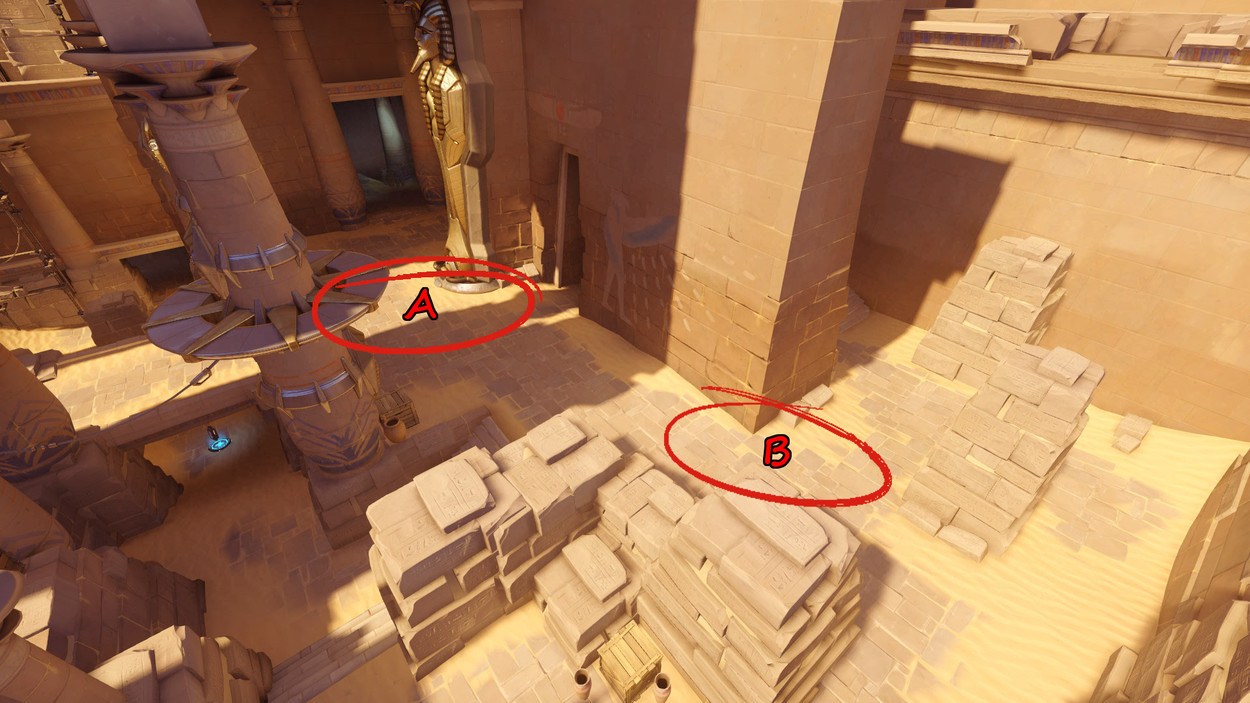
Defending this point can be standard fare. If the opposing team is playing a dive composition, tanks should hold the central bridge marked A, while Ana and Lucio should position around B so that they can escape dives while being able to provide support. If you’re defending against a standard or tank-heavy composition, position as a group around A and engage on the bridge or point.

Composed of both open and close-quarters environments, Temple of Anubis offers a lot of variety. A combination of varied elevation and narrow choke points can create a diverse, and sometimes frustrating, experience. Coordinate your pushes, position thoughtfully, and pick tanky compositions, and you’ll achieve greater success. Good luck!