Blogs
Boosters Engaged: An In-depth D.Va Guide

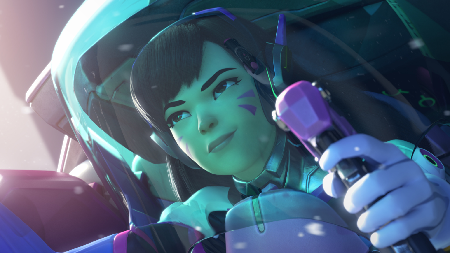
D.Va is a high-mobility, extremely durable tank who excels at blocking damage and creating pressure through flanking. Armed with powerful close-range cannons and low-cooldown jet boosters, she’s a powerful Hero in both offensive and defensive positions.
Playstyle
D.Va is a flexible Hero, possessing a good balance of damage output, mobility and durability. While often classified as a flanker, she has the potential to frontline for her team with her high armor and Defense Matrix. She’s also effective at swooping in and protecting teammates, with her Boosters enabling her to save allies and reposition constantly. While she fits well with most teams, she synergizes particularly well with diving-oriented compositions alongside Heroes such as Winston and Genji, who can gap-close and attack the enemy backlines with relative ease. While D.Va is a formidable tank, she’s seen less play as of late due to Zarya’s surge in popularity, hard-countering D.Va with her Particle Beam, which D.Va struggles to evade and cannot block.
Pros:
- High effective health
- Mobility
- 1v1 potential
- Powerful at close range
- Area control
- Hard to kill (Tanky + Pilot Form)
Cons:
- Weak at medium/long range
- Vulnerable against burst abilities (snipers, projectiles, bursty ultimates)
- Large headshot hitbox
- Hard-countered by beam weaponry
- Ability Breakdown -
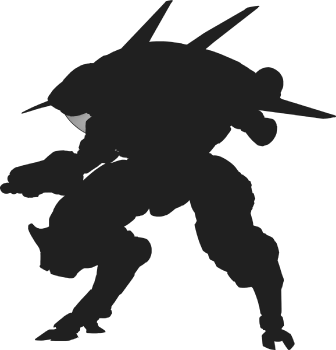 Mech Form:
 Fusion Cannons (Primary Fire)
- 0.5 - 3 damage per pellet, 8 pellets per blast
- 7 rounds per second (max ~192 effective DPS)
- Infinite ammo
- Headshot Capable
Fusion Cannons are rapid-fire shotguns that deal very high damage at close range, and very little damage at long distance. While you’ll be getting hit markers at long range, harassing enemies from afar is usually a waste of time. In combination with your Boosters, dig into enemy flanks to find good angles to focus your fire from.
To optimize your damage output, you should be aiming around the upper chest/head region, maximizing pellet coverage and landing headshots with 50%+ of them. Against tanks like Reinhardt and Winston, be sure to concentrate all of your fire at their head whenever possible, since they’re slow and have large headshot hitboxes.
 Defense Matrix (Alternate Fire)
- Project an array, eliminating all incoming projectiles and hitscan fire
- 15 metre range
- Lasts up to 4 seconds
- 1 second cooldown, 1 second cooldown delay
- 10 seconds to recharge entire charge meter
Defense Matrix creates an array in front of D.Va, consuming nearly all weapons fire that enters this field. Understand that this array projects in a large area in front of you, meaning that you can place this matrix over enemies such as a Reaper during Death Blossom to render them ineffective.
Many ultimates can be consumed with this ability, including Zarya’s Graviton Surge, McCree’s Deadeye and Pharah’s Barrage. Being able to both read and react to the enemy team’s behaviour is a complex skill, but will increase your potential to shut down enemy plays.
Using Defense Matrix to protect your team against enemy ultimates is central to D.va's playstyle. If you think the enemy team has offensive ultimates available, you need to be prepared to rush ahead and Defense Matrix or even body block these ultimates at a moment's notice. Pay attention to key gameplay queues that may indicate an enemy engage, such as the enemy Reaper teleporting to high ground nearby, the enemy Pharah moving in to flank, or even your team's Reinhardt losing their Barrier Field. Be aware of your surroundings, and ensure that you have Defense Matrix available for these crucial moments.
Defense Matrix will not block beam weaponry (Zarya’s Particle Beam, Mei’s Ice Beam, Winston’s Tesla Cannon). Despite technically being a projectile, Roadhog’s hook is not blocked either. In situations when you’re caught skirmishing with a Zarya or Mei, be sure not to waste Defense Matrix against them. You’re better off either retreating or just trading back with your Fusion Cannons.
In a one-on-one or small skirmish scenario, you should keep track of your opponent’s ammo count while holding Defense Matrix up. Once you know that they’re down to their last shot or forced to reload, drop your matrix and begin mowing them down with your Fusion Cannons.
Your matrix can also be projected through walls. While this won’t be useful most of the time, you’ll be able to absorb a Hanzo’s Dragonstrike arrow if he’s casting it from behind a nearby wall.
 Boosters
- D.Va propels herself in the direction she’s facing for 2 seconds
- 25 damage to each enemy hit
- 5 second cooldown
- Cancelled upon usage of Fusion Cannons
- Defense Matrix can be used while boosting
Boosters are D.Va’s most important assets and provide high mobility with a very low cooldown. They’re the reason D.Va’s a versatile Hero, enabling you to flank, retreat, clear obstacles and save teammates.
Use your Boosters to flank targets and create pressure in the enemy team’s sidelines. A simple non-specific flank can be broken down into a few steps:
- Boost in from the side or overhead.
- Use Defense Matrix to absorb your enemy’s initial reactionary abilities as needed
- Harass and/or kill key targets.
- Once Boosters are back up, either retreat behind your team’s frontline, dash for a health pack or reposition accordingly.
While D.Va is extremely tanky and mobile, it’s easy to get cocky and launch yourself into a dangerous position. Before flanking, evaluate whether or not you can survive for the five seconds that your Boosters will be on cooldown.
Correct usage of your Boosters is a major decider in one-on-one scenarios. They will enable you to chase down and finish off a retreating target, or help you boost towards health packs before they reach them.
Your Boosters make you an excellent Winston-esque flanker against snipers such as Widowmaker and Hanzo, giving you the ability to pressure their positions and pursue them. Maintaining a presence against these backline heroes can either render them useless, or force them to change Heroes.
Combined with her large hitbox, Boosters make D.Va an effective ‘guardian angel’, allowing you protect teammates. If your support or damage Heroes are under fire, use this ability to push away or block enemy fire as a fast-response shield for your allies.
D.Va’s melee strikes can be chained with her Booster’s ram, dealing 55 damage total (boost damage + 30 melee damage) while knocking enemies back. You can add more damage to this combo by firing a single Fusion Cannon blast the moment before you melee, adding an extra 24-48 damage to your burst when executed correctly (Boosters > Fusion Cannon > Melee). On capture point maps such as Ilios and Lijiang Tower, you’ll have many opportunities to strike unsuspecting enemies off of cliffs and ledges, making for easy kills and ultimate charge.
 Self-Destruct (Ultimate)
- Prime your mech to self-destruct after 3 seconds
- 1000 damage, 20 metre range
- Ejects D.Va into Pilot Form
Self-Destruct is an extremely powerful yet heavily telegraphed ability. When used tactically, it’s both a potent killing tool and a means of establishing area control.
Self-Destruct will remain at its location of activation when not affected by momentum, and cannot be moved by knock-backs. However, if you’re being pushed at the moment of activation, your ultimate will carry this momentum and be pushed away too. Otherwise, D.Va’s primed mech can only be displaced by Roadhog’s hook or Reinhardt’s charge.
When combined with Boosters, Self-Destruct will be propelled through the air, continuing to fly in the direction set at the moment of activation. Keep in mind that your primed mech will travel with whatever remaining charge is left in your Boosters at moment of activation, meaning that Self-Destruct will not fly far if used in the last moments of boosting. For optimal long-range ultimates, activate Self-Destruct the moment after you activate Boosters to fling it in a direction with maximum distance coverage.
Self-Destruct has a higher success rate when flung from a distance and arced upwards so it detonates before hitting the ground, since the explosion is harder to anticipate and more likely to strike Heroes from above their cover. Ultimates such as these should be flung at an arc 30°- 45° upwards, because a mech launched too far upwards may detonate too soon. It’s also a good choice to launch Self-Destruct directly upwards, which is less predictable and a powerful way to clear the area. However, be sure that you’ve expended your Boosters for at least half a second before firing straight up, or else your mech will fly upwards for too long and detonate too high.
Successful self-destructs are often unpredictable, launched from flanks and/or coordinated with your allies’ engages and ultimates. Detonating your mech from a surprising angle can not only nail some easy kills, but force your enemies into unfavorable positions. An ultimate placed behind the enemy may pressure them to retreat from an objective, or force them to flee into the open for your teammates to mow down.
 Pilot Form:
 Light Gun (Primary)
- 14 damage per shot, 20 ammo
- Medium-speed projectiles, no drop-off
- Fires 6.66 rounds per second
- Effectively ~94 damage per second
- Headshot capable
While in Pilot Form, D.Va is equipped with only a pistol, which happens to be surprisingly powerful. In this form, damage output with Light Gun is D.Va’s primary means of generating a new mech to call down.
Light Gun has a much higher effective range than your mech’s Fusion Cannons. While Light Gun’s damage values are high enough to compete against many offense heroes, you’re extremely vulnerable, so you should mostly avoid trading fire with dangerous heroes like McCree and Tracer. Position carefully, and find safe locations to fire from. Position yourself behind cover to spam fire and pivot from, or retreat behind your team and start charging Call Mech so that you can return to the frontlines ASAP. If there’s no enemies around, spam shots towards choke points and corners that enemies will likely emerge from at roughly head-level.
 Call Mech (Ultimate)
 - Call down a new mech, entering Mech Form
- 2 second duration
- Deals 50 damage upon arrival to all adjacent enemies
Once you’ve generated enough charge to use Call Mech, you may want to hold off from using it immediately, since your pistol is a formidable long-range weapon. You may want to spam your pistol for just a few extra seconds to land some final shots on some distant foes or to finish off any enemy stragglers. If you’re anticipating an enemy push, need to be frontlining or you're caught in the middle of a fight, call it down immediately.
Be aware that during the 2-second channel of Call Mech, your Pilot Form will still be briefly exposed. Ensure that you’re facing towards potential damage sources before you cast it, as your rear is vulnerable since D.Va enters her mech from behind.
Tips
Once a match goes into Overtime, Self-Destruct becomes a far more powerful tool, able to force the enemy team to retreat from the capture point or payload. If a match is coming down to its final moments, rush for Ultimate charge or save it so that you can detonate a potentially match-deciding mech.
While only a couple of enemy abilities can interact with D.va's primed mech, D.va herself can actually physically nudge it with her hitbox in Pilot Mode. You can use this to your advantage, dropping your mech upon unsuspecting enemies like so!
While team-wiping with Self-Destruct is spectacular and makes for great play-of-the-game clips, you shouldn’t be looking to hit the entire enemy team with your ultimate most of the time. Targeting one or two enemy heroes with your ultimate will typically have a higher success rate than riskier, ambitiously-placed ultimates.
When ulting, be aware of Mei’s Ice Wall, Reinhardt’s Barrier Shield, Winston’s Barrier Projector and Zarya’s Particle Barriers, as they will completely block the single instance of damage from D.Va’s self-destruct, even if the blast damage exceeds the barrier’s remaining durability.
Along with the aforementioned beam weaponry, Reinhardt's hammer is one of D.va's biggest threats. To an enemy Reinhardt, you're effectively an Earthshatter battery, so be sure to keep your distance!
Further Resources
- A breakdown of some useful D.Va ultimates on Hanamura & Volskaya Industries: Link
- A look into some of the unusual interactions and discrepancies with D.Va’s Defense Matrix: Link
- INTERNETHULK of Team EnVyUs’ master-tier D.Va competitive gameplay, featuring examples of flanking and backline pressure: Link

D.Va is an incredibly powerful tank when played thoughtfully, creating a presence with her obnoxious durability and mobility. Capitalize on her strengths, and D.Va can boost her team to victory!
Get your own AKRacing Chair here and support our players, all profit goes towards the teams!