Blogs
Terrorist Side Basics for de_Overpass
Introduction:
This will be a look into the many kinds of smokes and molotovs to throw on the map de_Overpass. It is good to know these things for matchmaking and pugs as they will help with taking Bombsites and map control. Below will consist of a few basic smokes for each bombsite and a couple molotovs that will help take each Bombsite in different ways. I will also go over map control and defaults for the map.
Default:
A basic default setup on this map would be to have one to two players in Construction and one to two players in Connector and two to three players in Playground Fountain area. The reasoning for this setup is that you can play these setups different ways. If you have three players near Fountain, then you can play aggressively on that side of the map and have the other two position hold passively for rotations or just for information. The coordination in a pug or matchmaking will hamper your abilities to commit to this type of setup, but you can read where your team is going and what they are doing on one side of the map then you can do the opposite on the other side of the map.
Bombsite B:
For Bombsite B it is important to have control of construction. You do not have to have control of Connector and that is why it is easier to take control of Bombsite B than A. While having control of Construction you can split B by going up Sand Bags and Monster very quickly. Most of the time Counter-Terrorists do not push into Construction and hold passively on the Bombsite or in Heaven and Terrorists can use this to their advantage. It is important to have control of Connector especially since it is a position you can be flanked from. When throwing the smoke on top of Heaven it is important to have Connector control since if a Counter-Terrorists pushes out of Connector you will be exposed to him. Taking control of Connector is simple, you just have to either smoke off the stair side and push through, having someone wait behind to pick off anyone coming to exit through the door. Once you have control of these positons you can push onto the Bombsite, unless you are rushing because the idea of a rush is to catch the Counter-Terrorists on the Bombsite off guard which you do not need map control for.
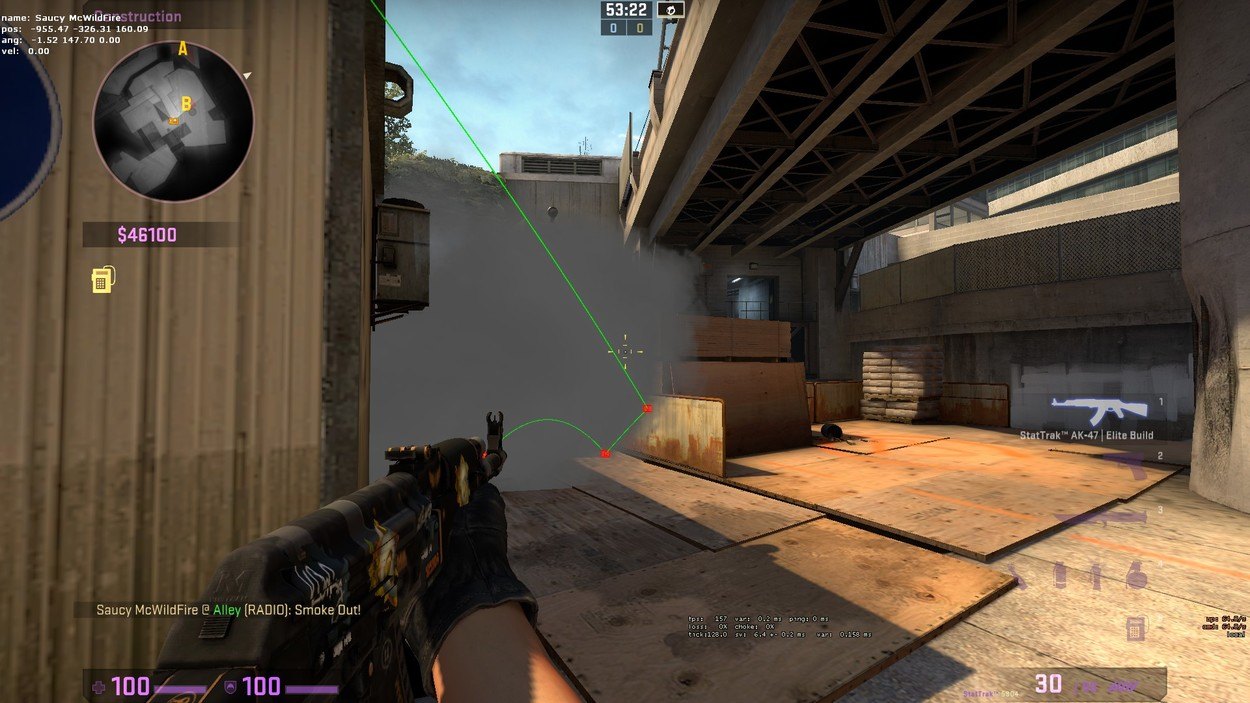
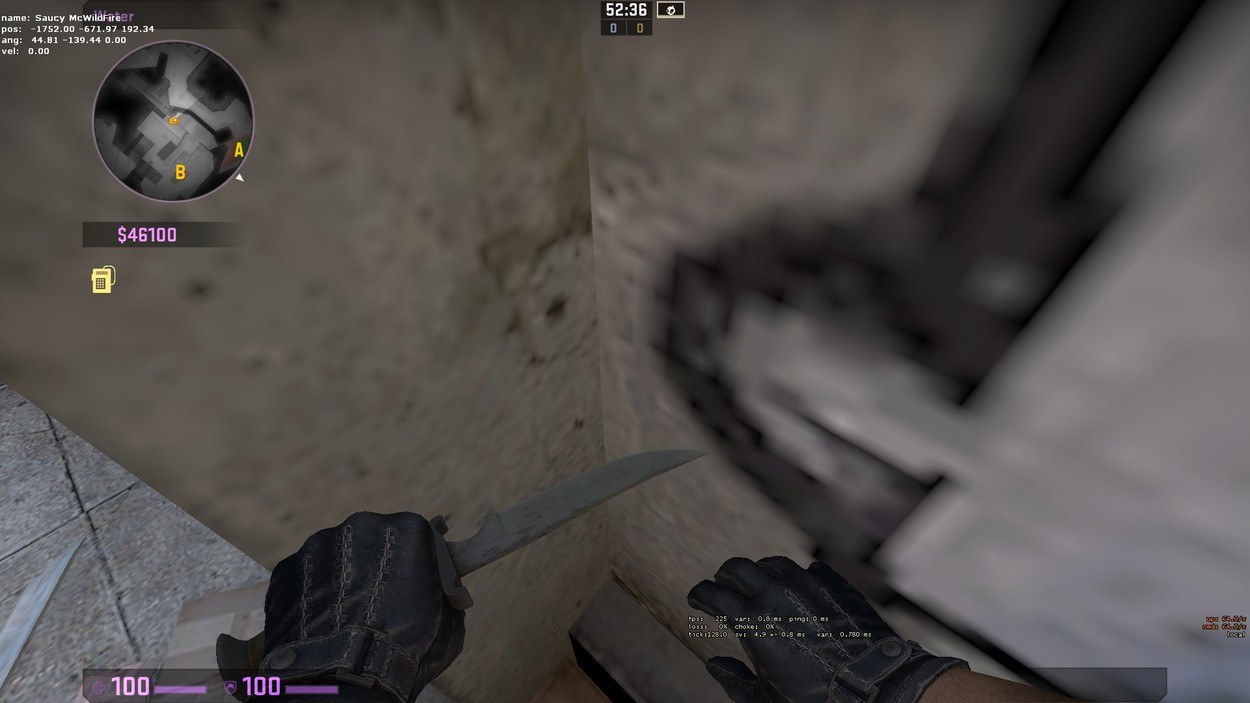
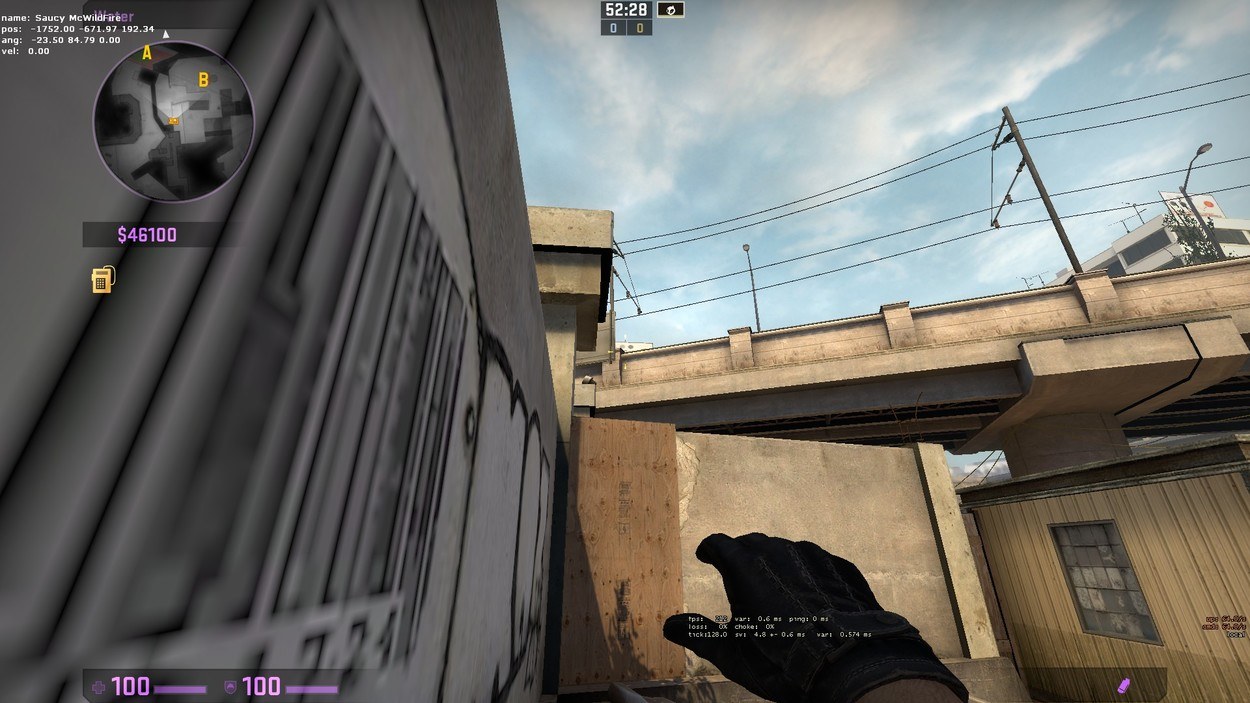
This first smoke will block bridge and will help Terrorists from getting picked off from the Counter-Terrorist entrance to the Bombsite. To throw this smoke is very easy and you walk up to the barrel that is above the stairs leading down to Monster. You will want to tuck yourself into the corner that I have shown in the pictures below and then look towards the train tracks. Line up your crosshair to the top of the wall around the train tracks and with the edges of the color changes, there is a picture below showing this. It is a simple left click throw and I have cl_showpos 1 enabled to show the exact position and angle.
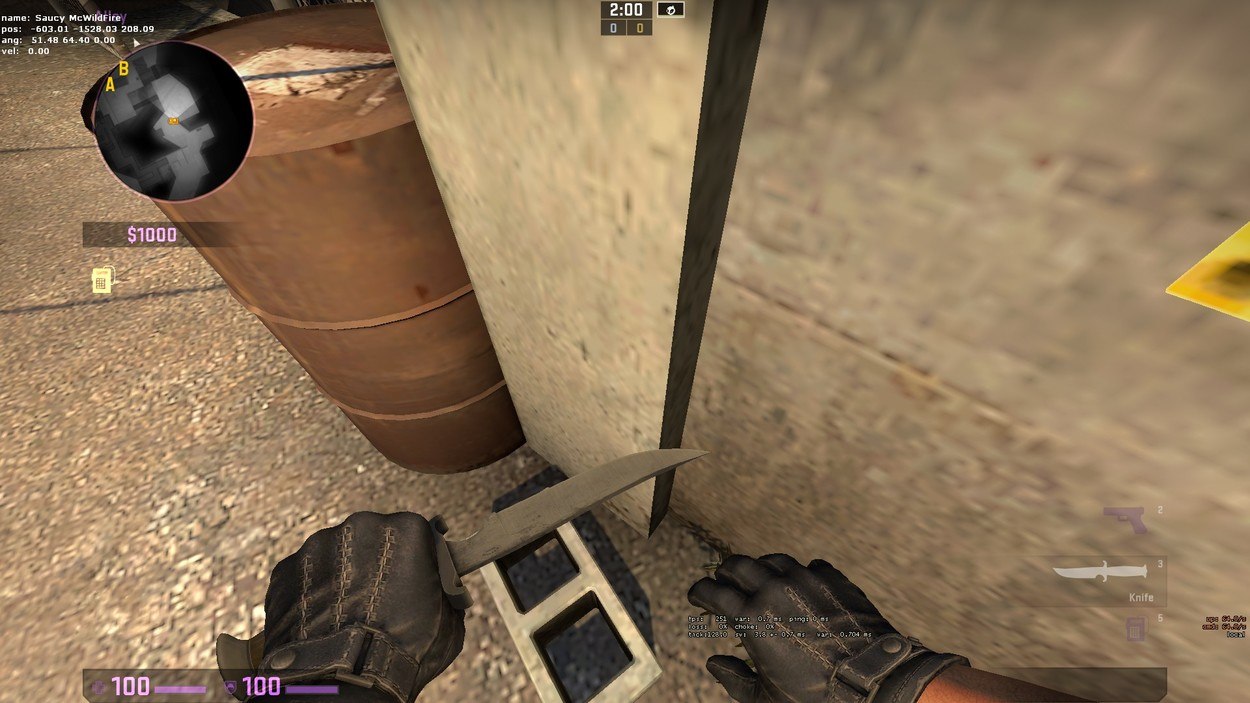
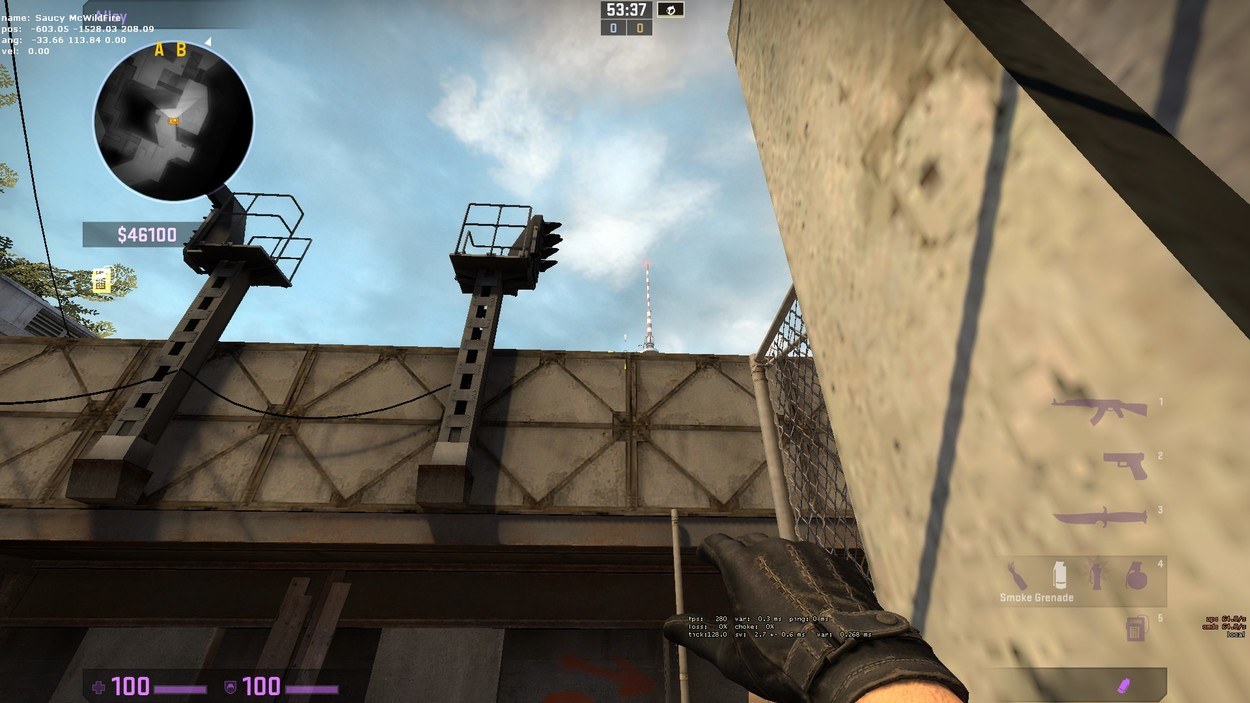
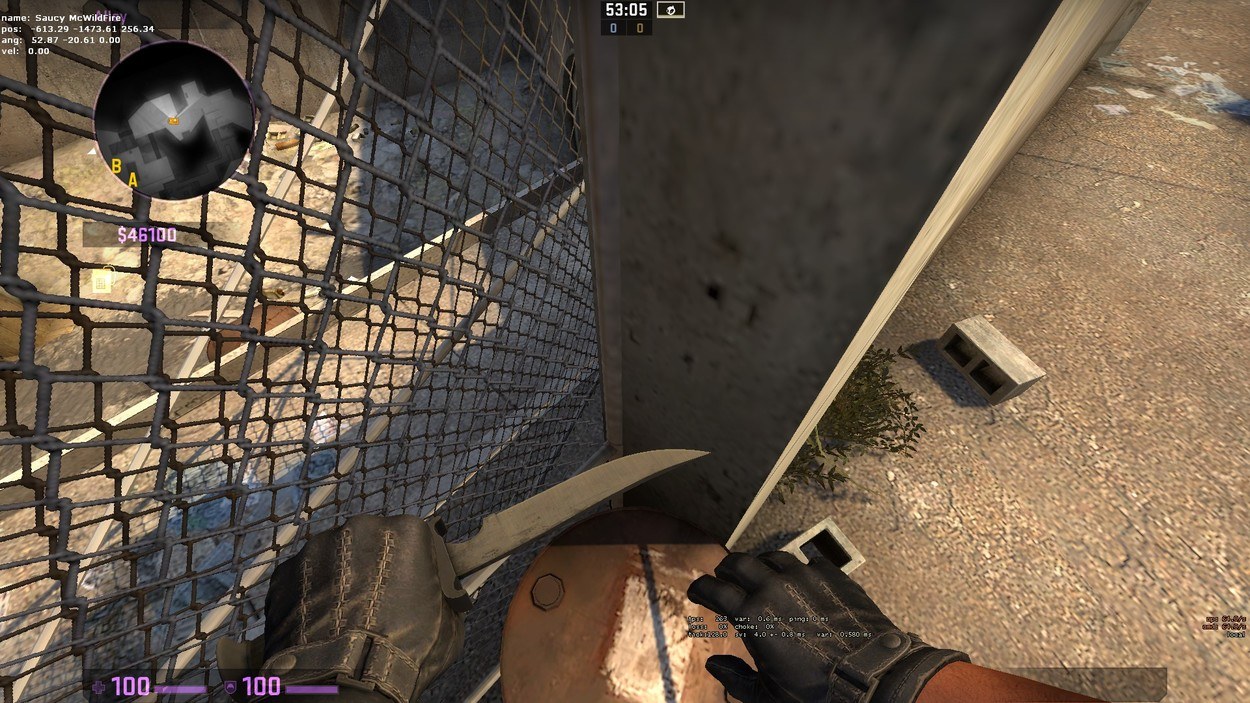
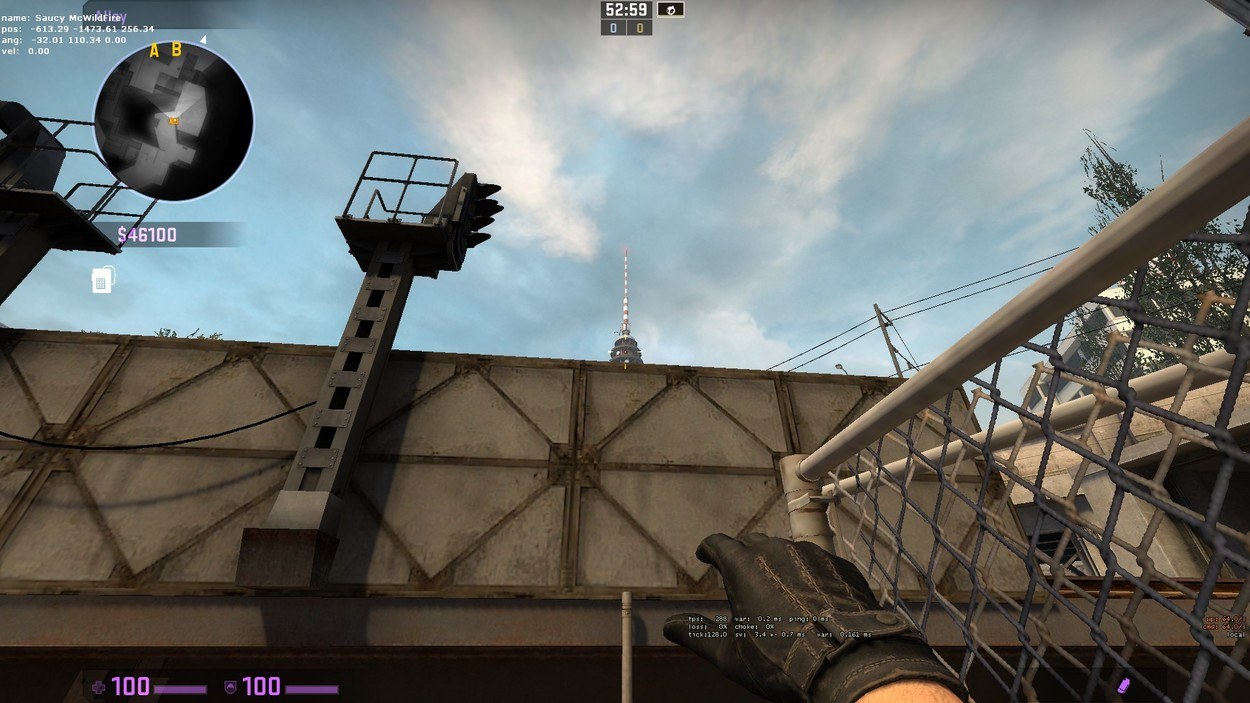
The second smoke at the B Bombsite takes place right next to the first smoke but, on top of the barrel. There is another corner for you to tuck yourself into and you can see this in the first image below. Lining up your crosshair is very easy for this smoke and it is in a dark square on the red tower. There are three levels and you want the square in the middle level and that is shown in the second image below. This smoke allows for you to run up the left side of the pillar when entering from Monster without being seen from Heaven. It allows for safe bomb plants and easier control of the Bombsite.
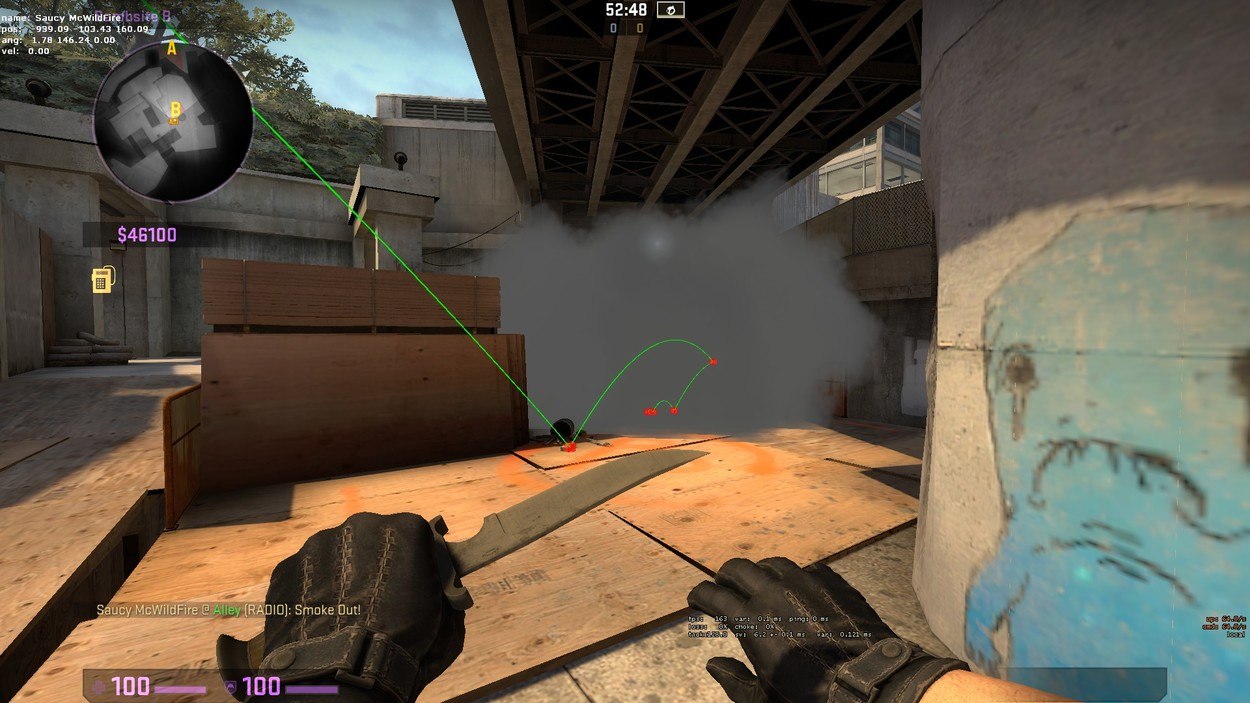
The third smoke is right outside of Connector on the stack of wood. You will need to tuck the character model into a corner again and I have that shown in the first picture below. Line up your crosshair with the pillar on the bridge and the ledge on the bridge shown in the second image below. The smoke is a simple left click smoke and blocks off the Heaven position. This smoke is especially good on gun rounds, since the AWP players on the Counter-Terrorist side will play inside of Heaven. The makes their AWP player useless and has to re-position himself to become useful again. Even if the AWP player is not in Heaven it stops Counter-Terrorists from rotating into Heaven from the A Bombsite, which gives your team more time for an after plant set up.
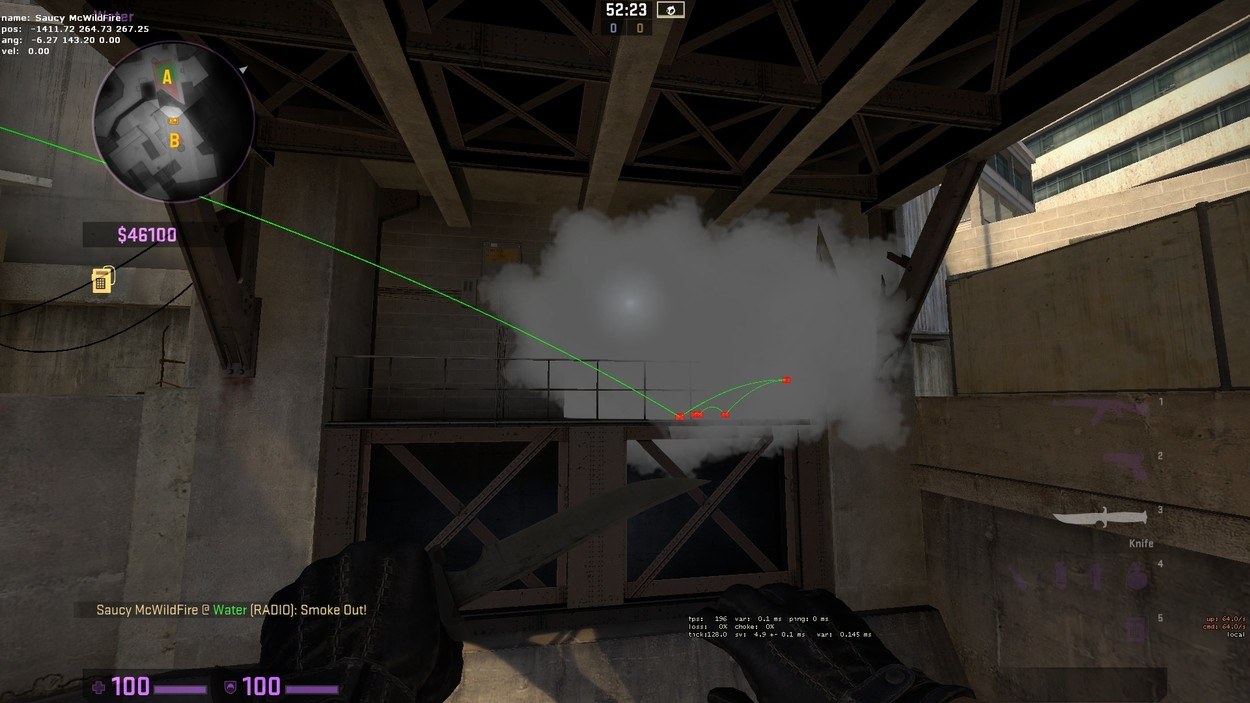
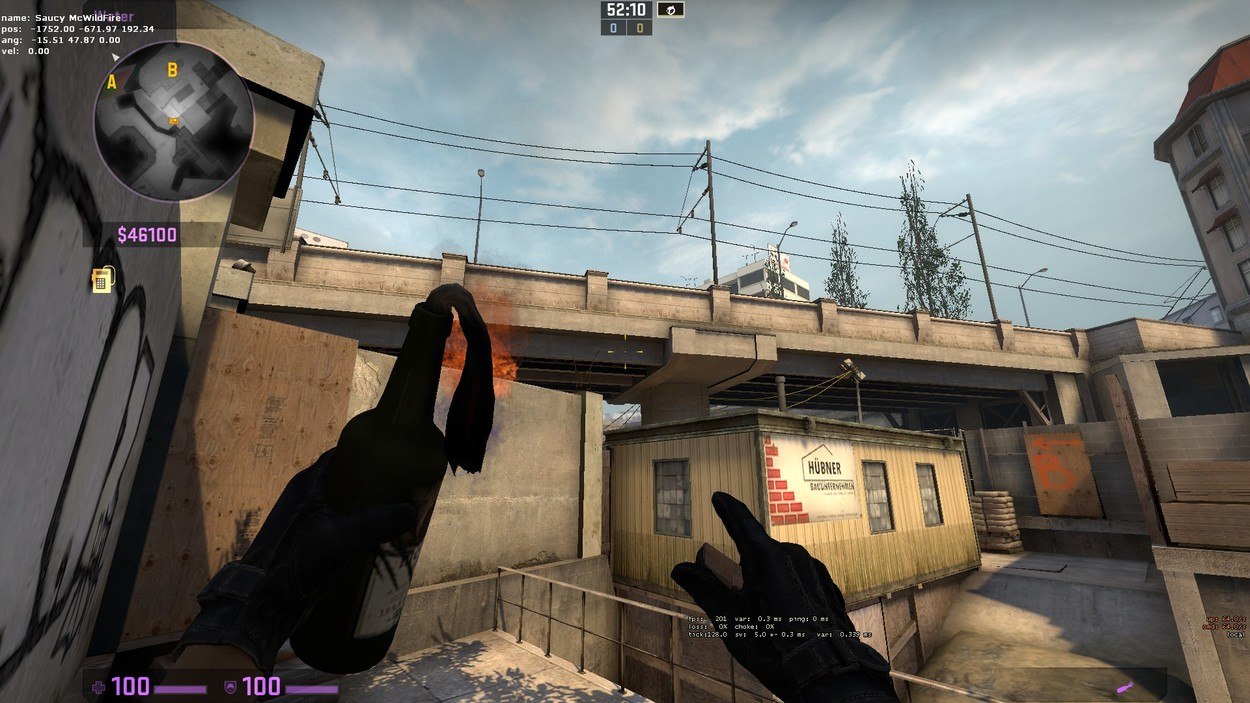
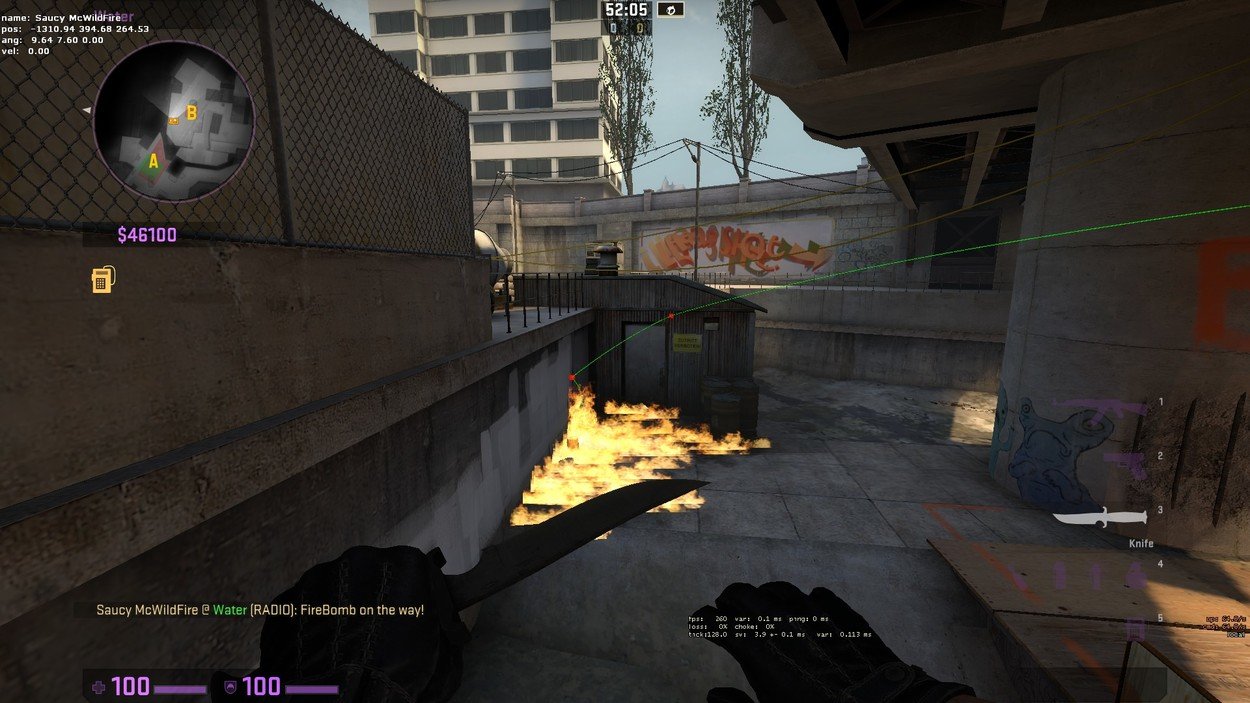
From the same position that you throw the smoke into Heaven you can throw a molotov into Barrels. I have pictures showing where to point your crosshair this is a bit loose on where you have your crosshair. Just have your crosshair above the middle of the gap on the left side of the pillar and then move forward with a left click. There are two pictures showing this below. This is a good Molotov to know, since Barrels is a common position on the B Bombsite and knowing that the position is cleared out is advantageous for your team.
Bombsite A:
For Bombsite A it is important to have control of Bathrooms, Connector and Long before pushing onto the Bombsite. This is because you can easily be picked off from the many angles in Bathrooms and you can’t push onto the sight without it as well. Connector since that is the fastest place for Counter-Terrorists to flank from. Long for the same reason as Connector. You can be easily flanked from the Long position from multiple angles. This is why the A split is so common on the A Bombsite, it gives you control of Long and Bathrooms and pushes the Counter-Terrorists back to the A Bombsite which is when you would use these smokes below. Gaining control of Long and Bathrooms can be difficult depending on how far pushed up the Counter-Terrorists are holding. You can use smokes to push back Counter-Terrorists, or use flashes kill them. To get control of Connector you need to get control of Party and sandwich the Counter-Terrorist(s) in Connector. Once you know they have fallen back to the Bombsite or they are dead you can do the setup for the smokes and molotovs.
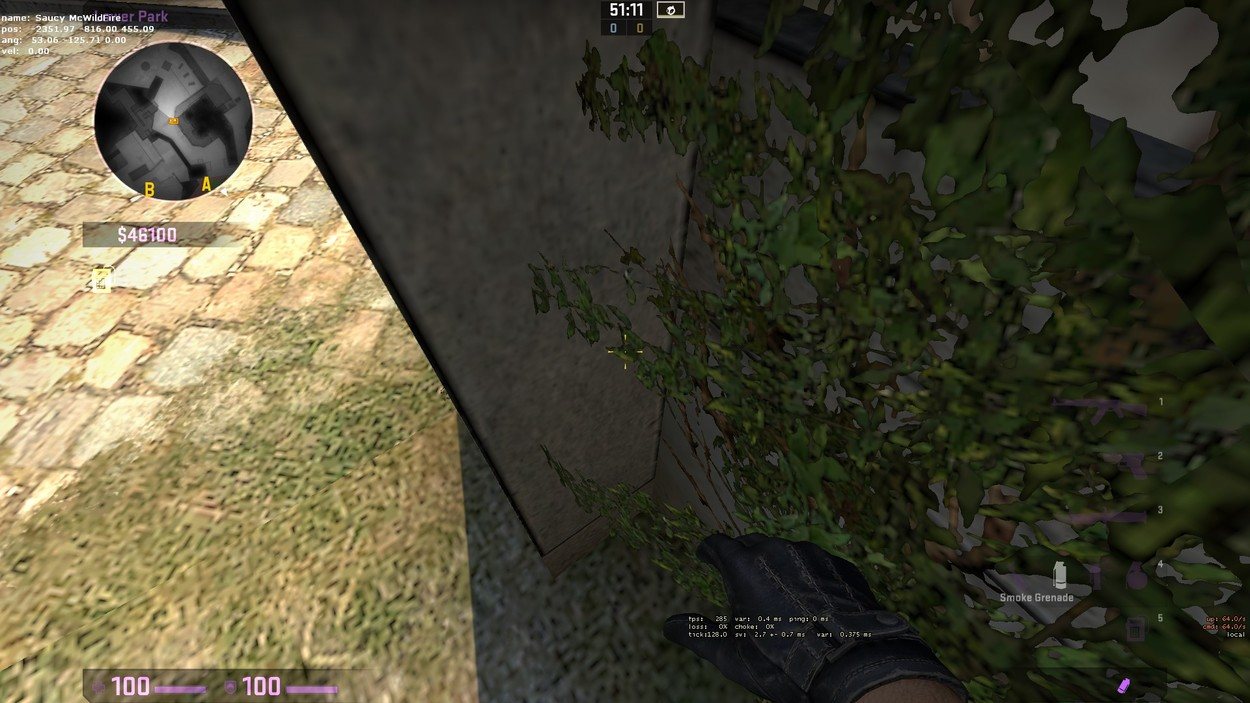
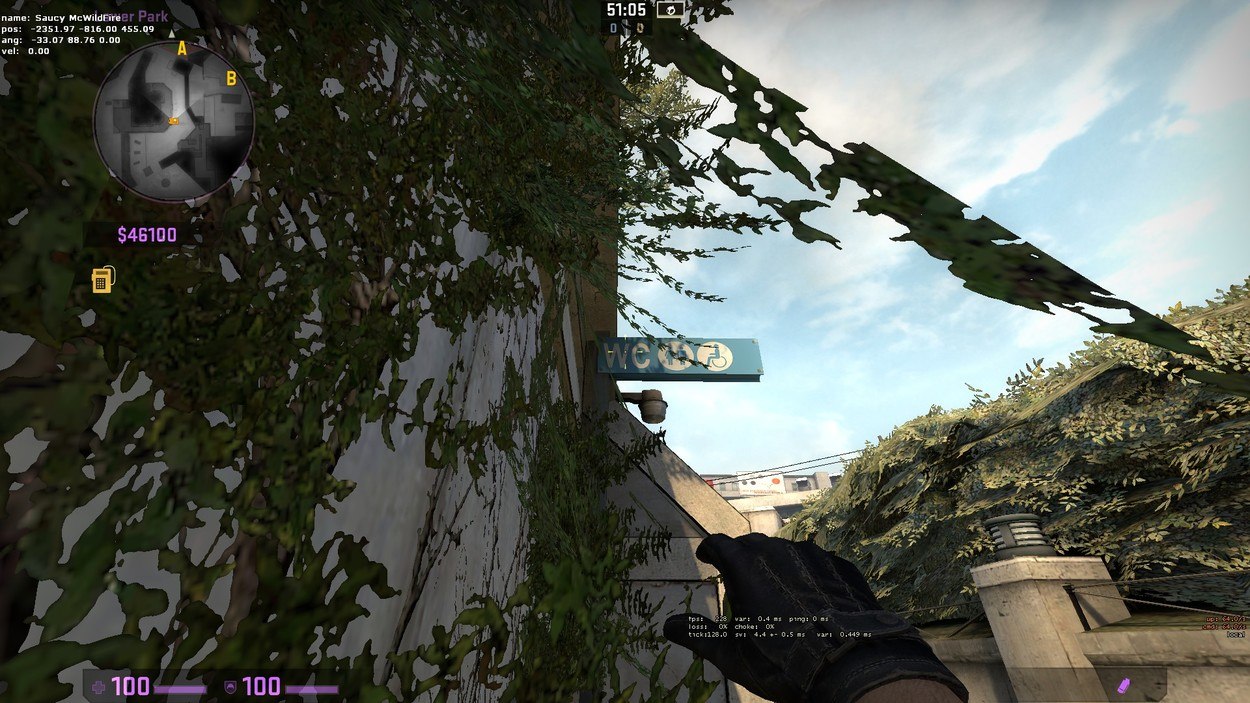
The first smoke is to block off the space between the Default Plant spot and Truck. This smoke blocks off the stairway that Counter-Terrorists would be rotating in from the B Bombsite and blocks off Bank if you move to the Truck position. Line up with the pillar behind the first bench outside of Bathrooms. Line up your crosshair with the point in the middle of the w on the blue sign and the left edge of the right line of the w, you can see this in the second image below. This smoke is very useful; it helps take control of the A Bombsite and limits the amount of angles that the Counter-Terrorists can hold on the A Bombsite.
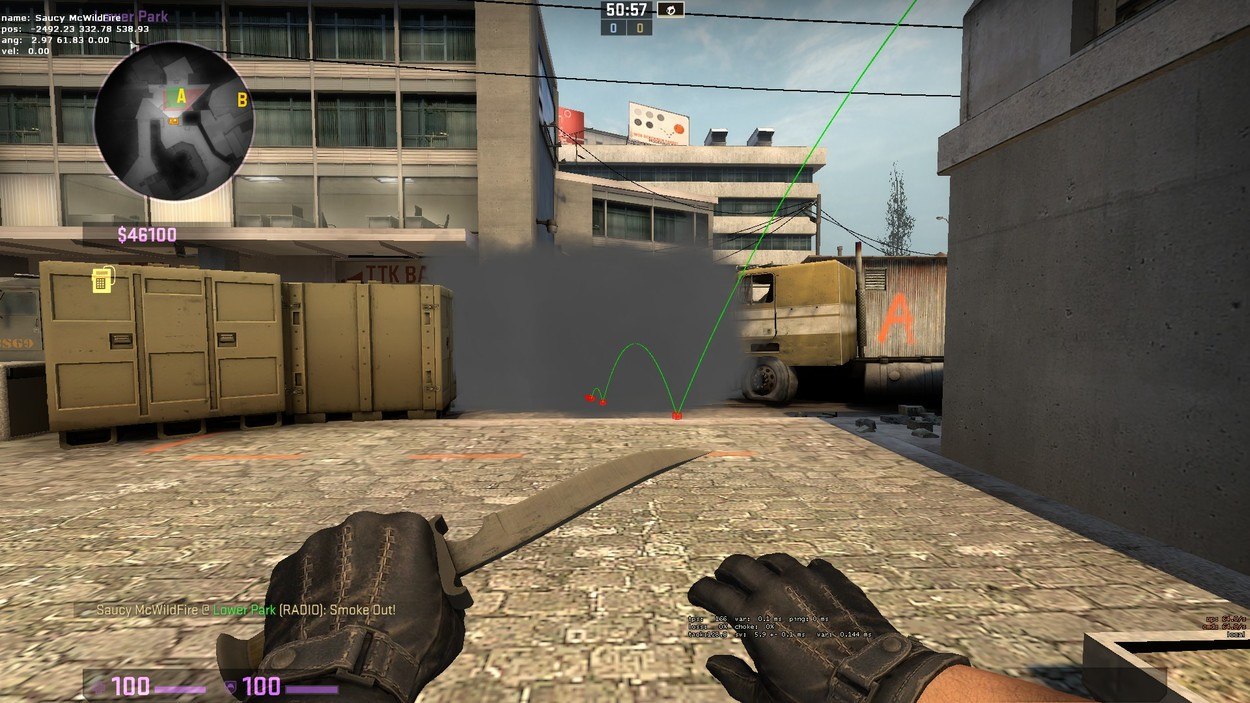
This second smoke is for taking long and can be used with the first smoke. This smokes positioning is a loose and I usually stand anywhere in the end of the plants outside Bathrooms at Long, which is shown in the first picture below. Line up your crosshair with the center of the B above Bank and the umbrella. Move forward while using left click to throw this smoke. It blocks off Bank and the back of the A Bombsite from seeing into the Long position allowing your team to move up safely.
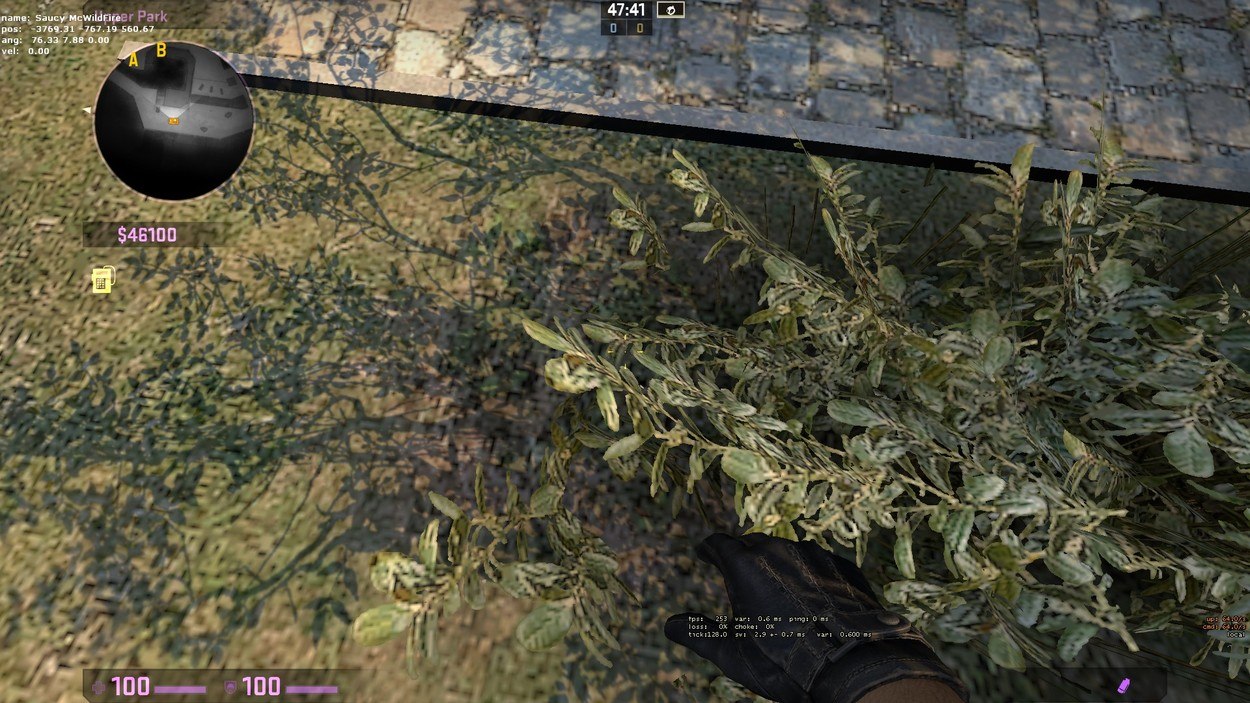
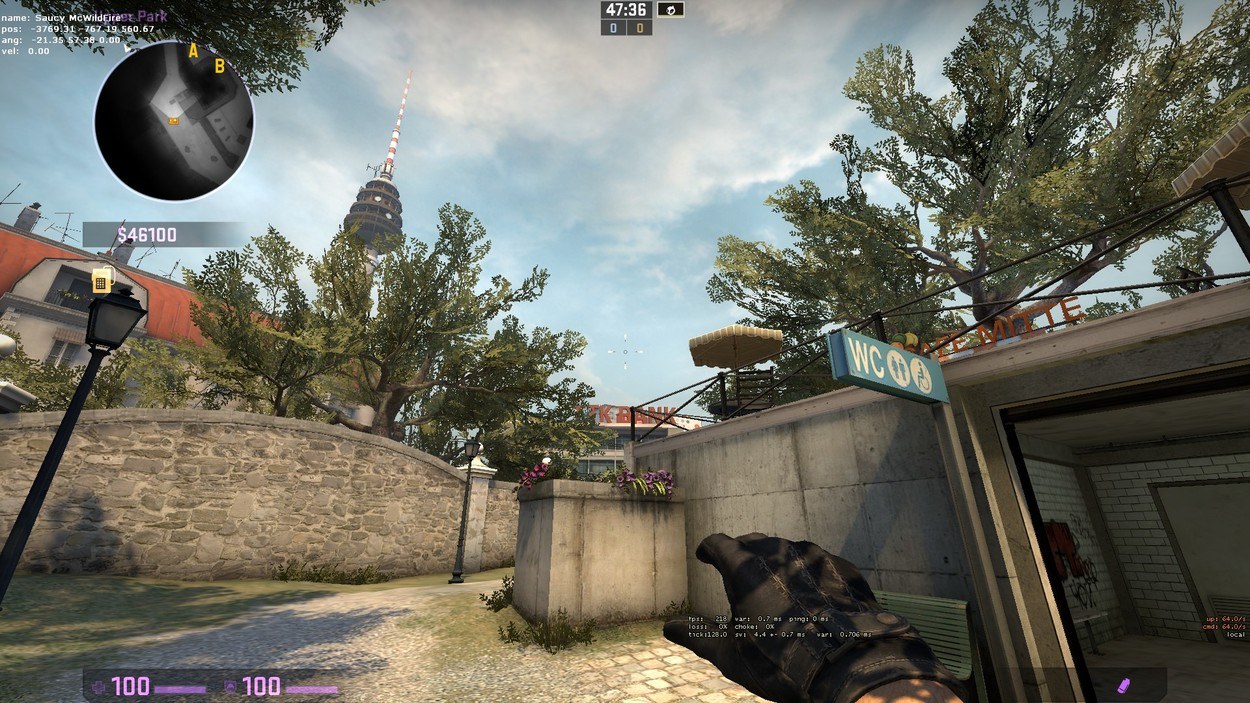
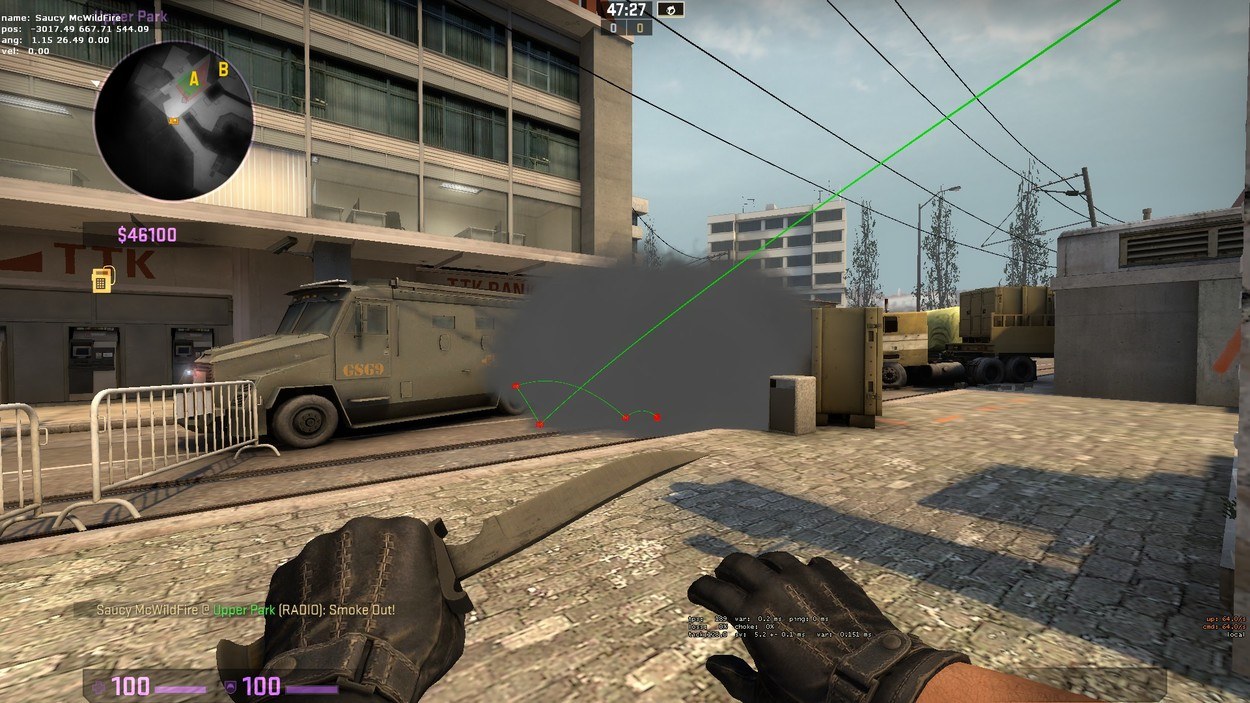
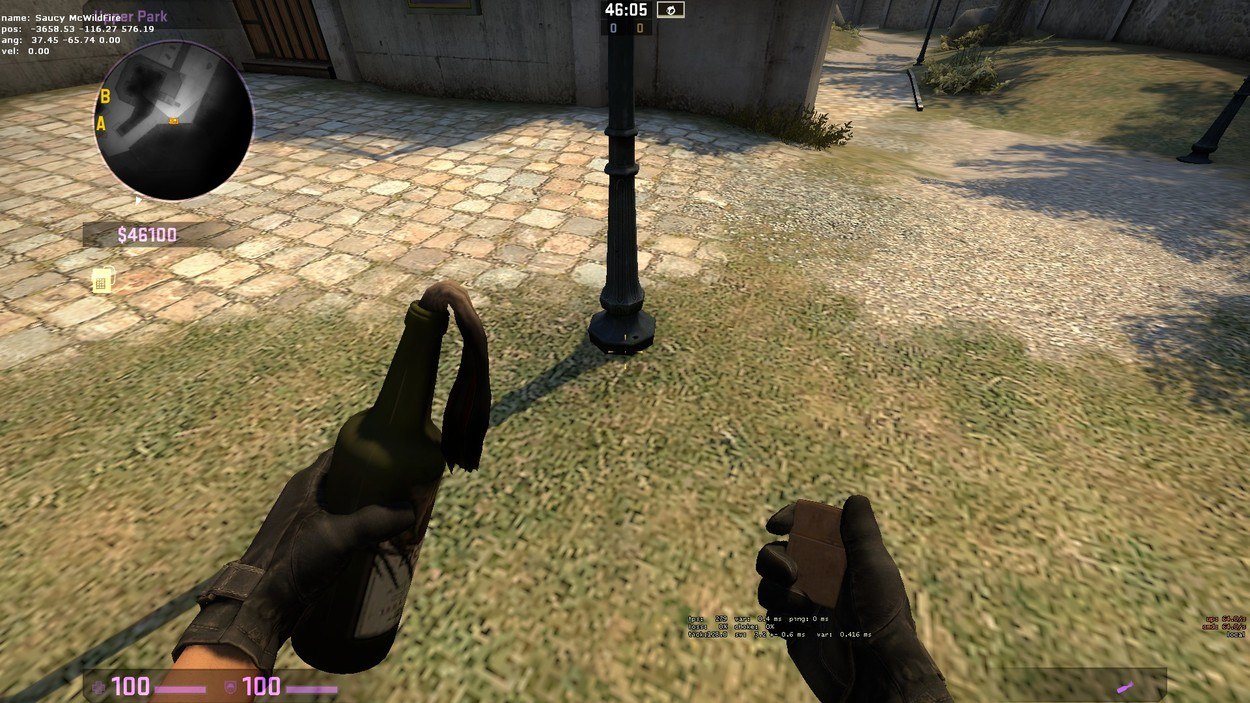
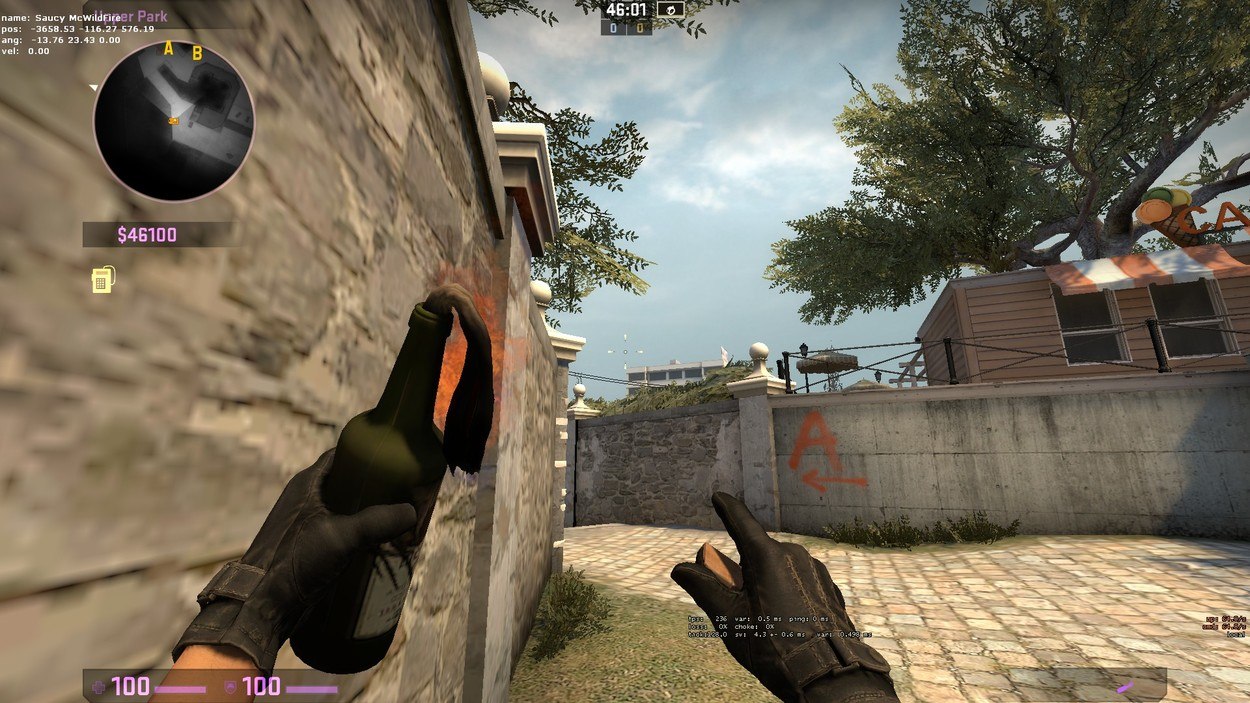
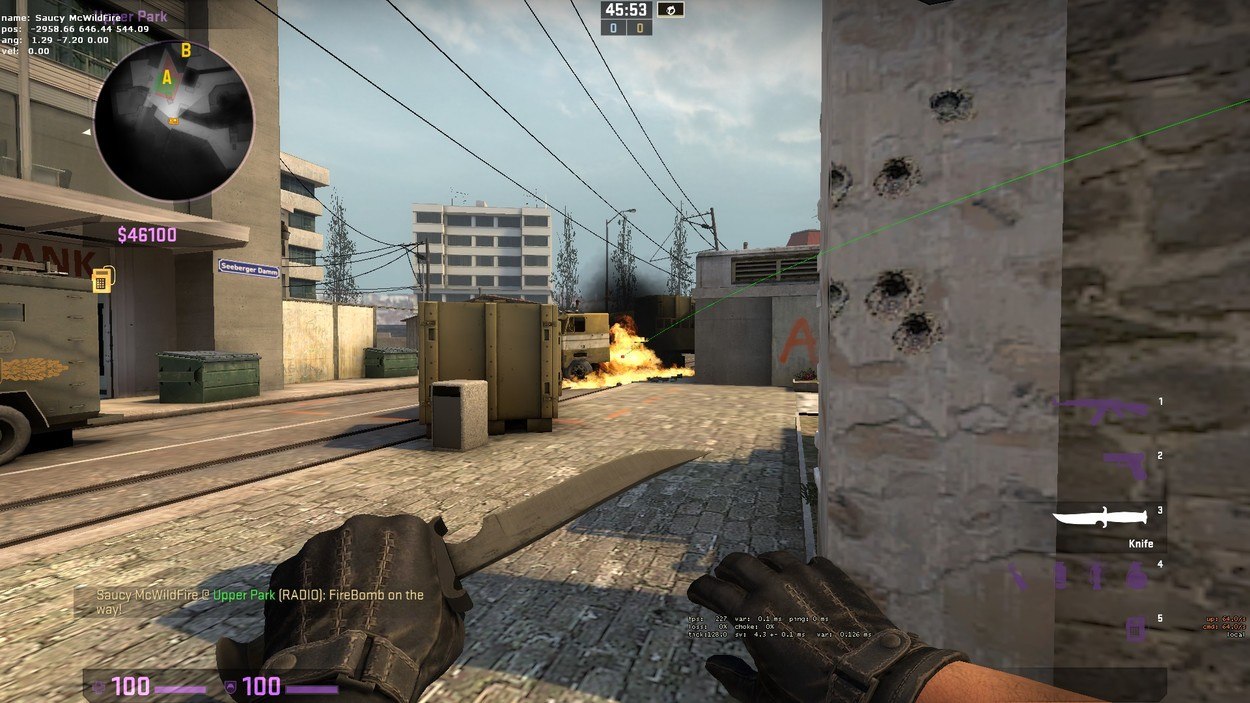
To throw a molotov on the Truck position from Long, stand on the left of the last lamppost. Line up your crosshair with the left side of the building a put it a little but into the sky, this image is shown in the second image below. Move forward while you left click to throw this. There are easier ways of throwing this molotov, when you use the first smoke on Bombsite A and then walk up and throw it off the side of the truck, but with this way you throw it without exposing yourself. This molotov used with the two smokes completely cuts off the A Bombsite and allows for a default bomb plant.
Conclusion:
This is a basic look into the map de_Overpass. All the smokes and molotovs that are in this guide have cl_showpas 1 enabled which shows the exact position and angle. The reason for this guide is to have a basic understanding of overpass and to enable you to play the map and not look incompetent on the map. All of these smokes and molotovs are in 128 tick and may not be the same in a 64 tick server. Hope this can be helpful for you in any way.
Get your own AKRacing Chair here and support our players, all profit goes towards the teams!