Blogs
5 Must Know Popflashes for Cache

Cache is a map which has many small angles on it, many of which can be exploited through flashbangs or more specifically popflashes. Like many other maps, popflashes on Cache are better utilised on the Counter-Terrorist side, but Ts can find themselves in certain situations which a popflash could save them. Popflashes can be extremely beneficial if utilised properly when not anticipated by your enemies. Predominately, AWPers are caught out by flashes, as the darkness around the scope renders that area useless for vision, allowing you to blind them with a well-placed flashbang.
Popflash 1: Mid Garage (T)
This is a great flash for pushing out the middle area, rendering any close enemies looking at the entrance momentarily useless. This flash is a great one when on an eco, as it can often give a pick on a cocky out of position CT. The downside to this flash is that it bounces relatively late in its travel, which could alert enemies to the location. However, this is unlikely due to happen due to how late the flash bounces, which gives your enemies very little time to react. Beware that this is a running throw and will require a short run up for it to be effective.
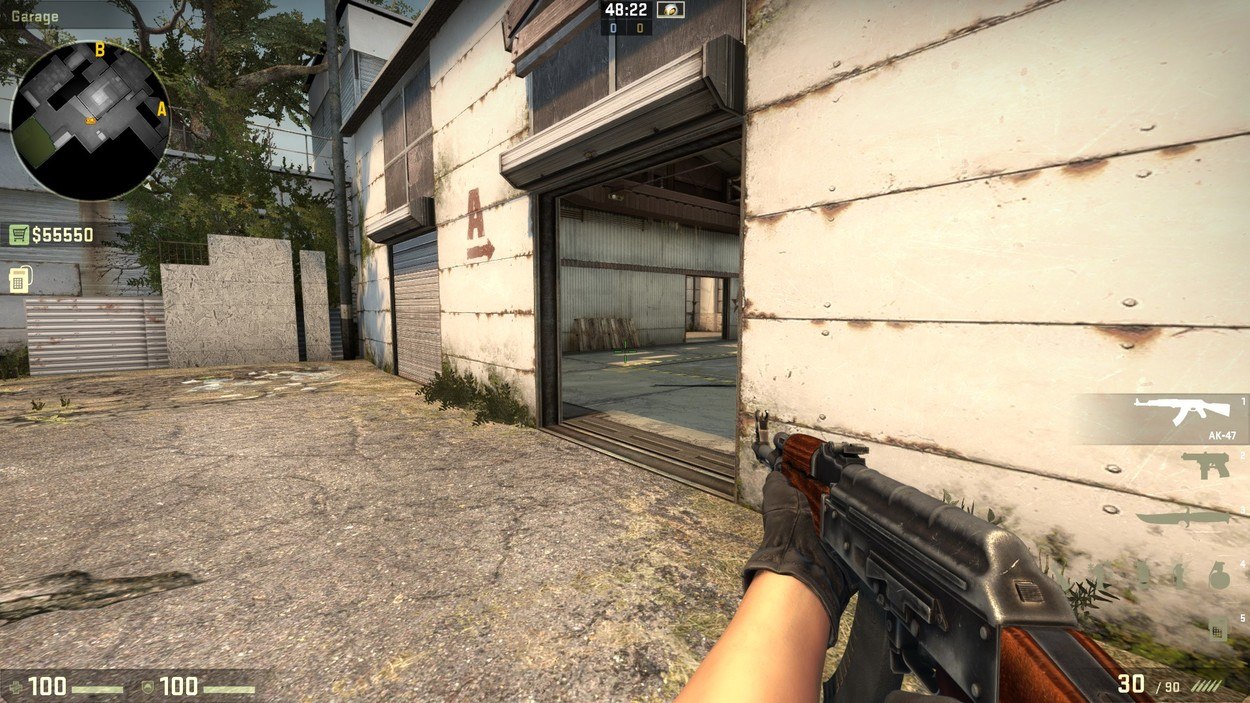
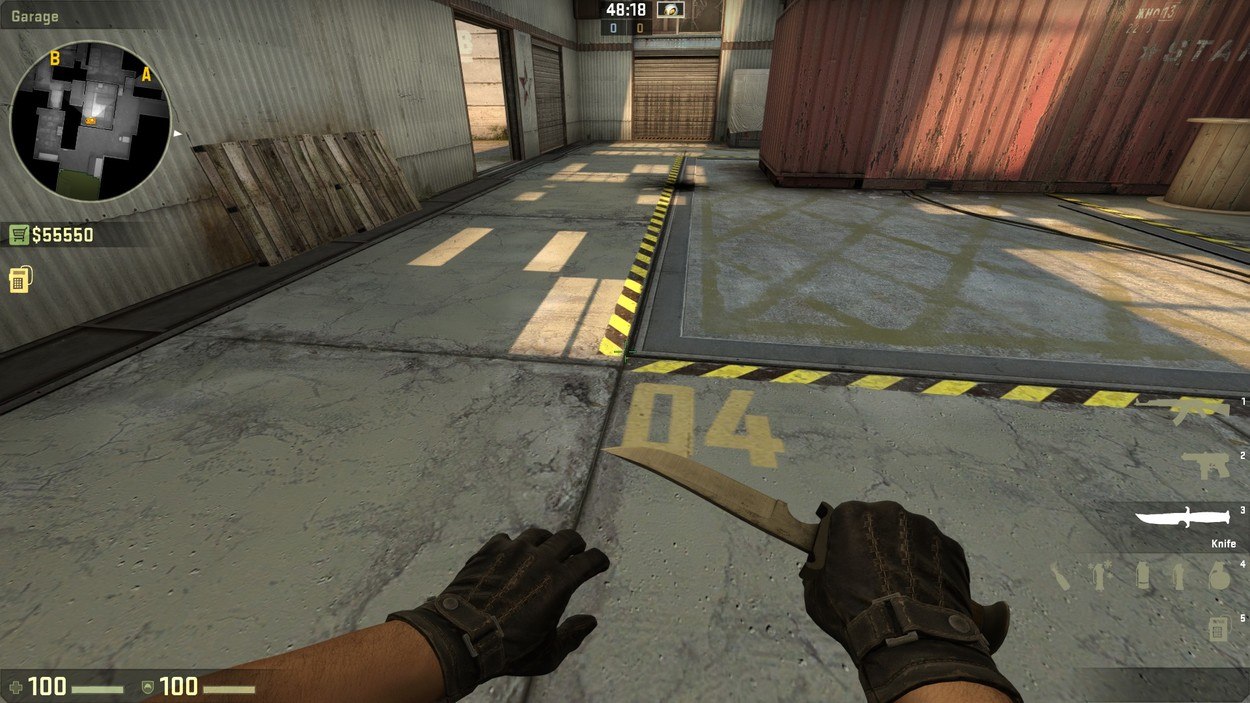
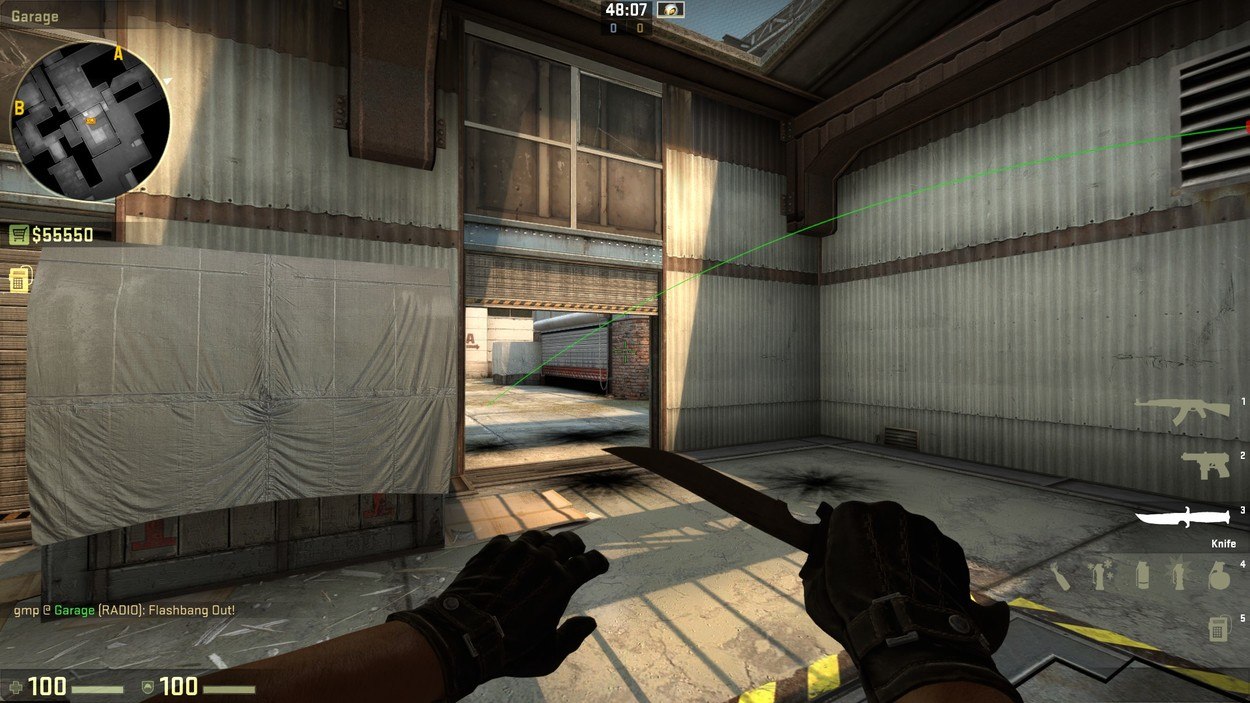
Left: Area to throw from. Right: Exact point of throw (beware that this is a running throw and will need a small run up.) Below: Impact area of flash.
Popflash 2: Mid Garage (CT)
Flashbangs aren't often direct counters to another flash, but this is the case for this one, as it directly counters the previous one. While the previous one has a rushing strength and counts on enemies being relatively unprepared, this one is more strategic and can give you a strong advantage in combat. This flash will blind any enemies in the immediate vicinity and has a quite large area of effect, as all enemies in the open near the door will be blinded. Obviously, enemies who are behind solid objects won't be flashed so it's important for the user of this flash to be well aware of the situation before using this flash because, although it can go very well for you, a misplay from this location will lead to almost certain death.
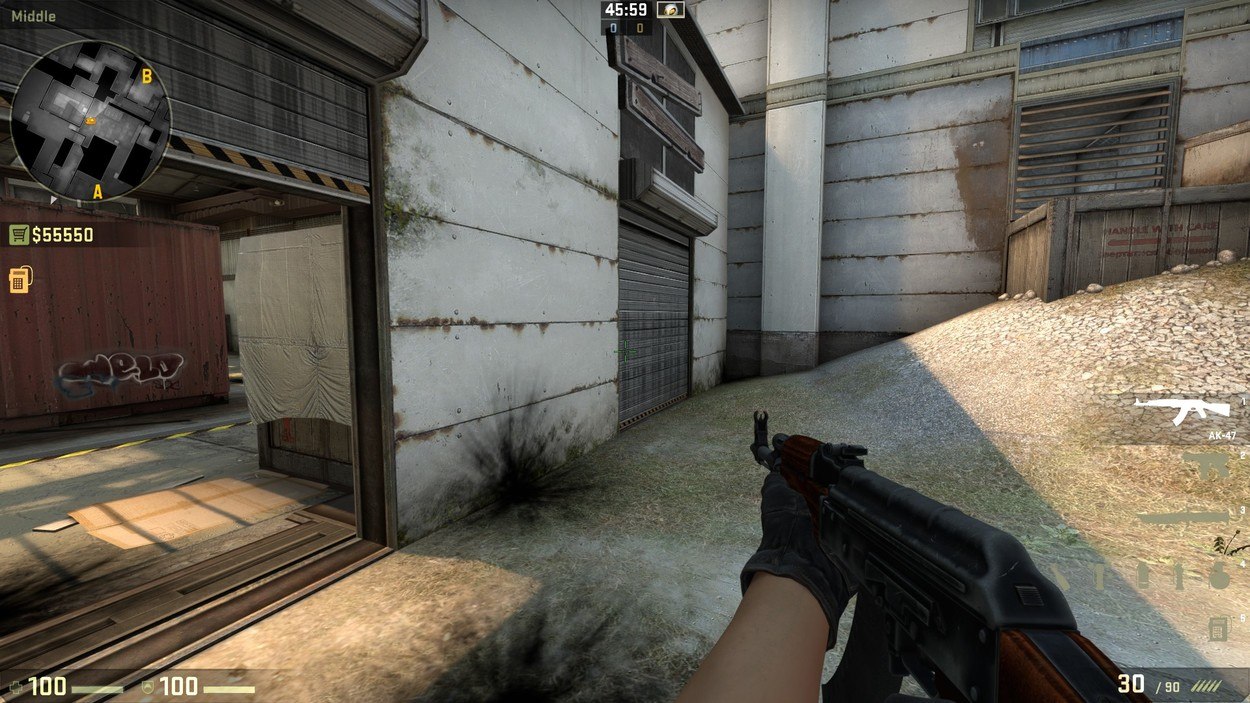
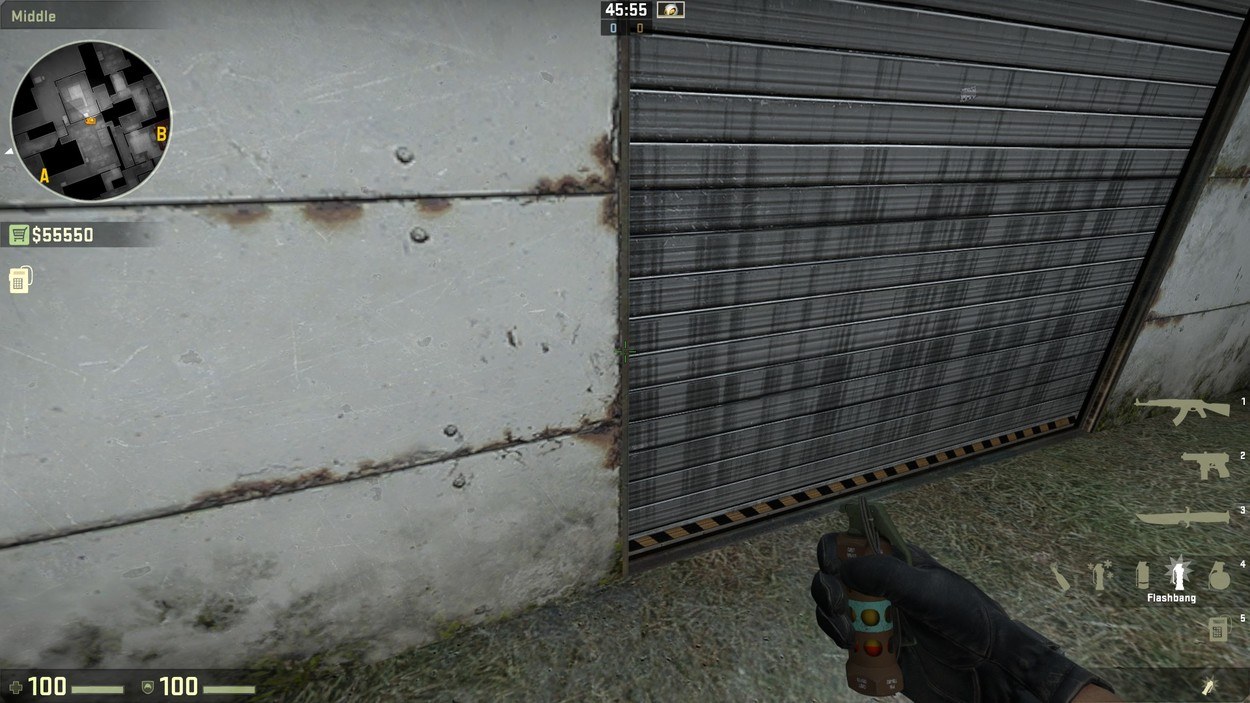
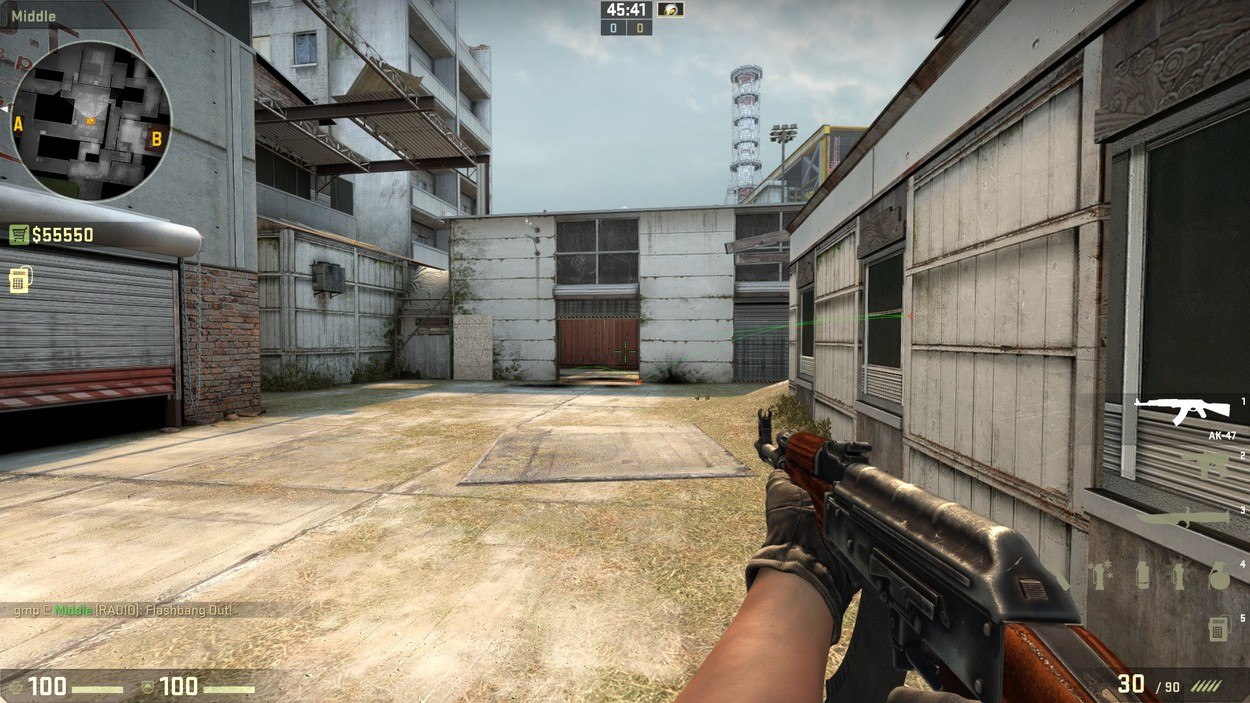
Left: Area to throw from. Right: Exact point of throw. Below: Area of impact.
Popflash 3: A Main (CT)
This flash has been my flash of choice for a long time now on eco rounds, as it comes in at an odd angle, leaving less experienced enemies very susceptible to it. This flash is one of the faster ones in relation to round time, which can easily give you the jump on an enemy or two with only a P250. However, more and more players are becoming aware of this cheeky play, often countering it at round start and being very aware of the main area for the first 30 seconds or so. I think that the pros still outweigh the cons when it comes to this flashbang, as most times that you'll try it will be on eco rounds when you have nothing to lose.
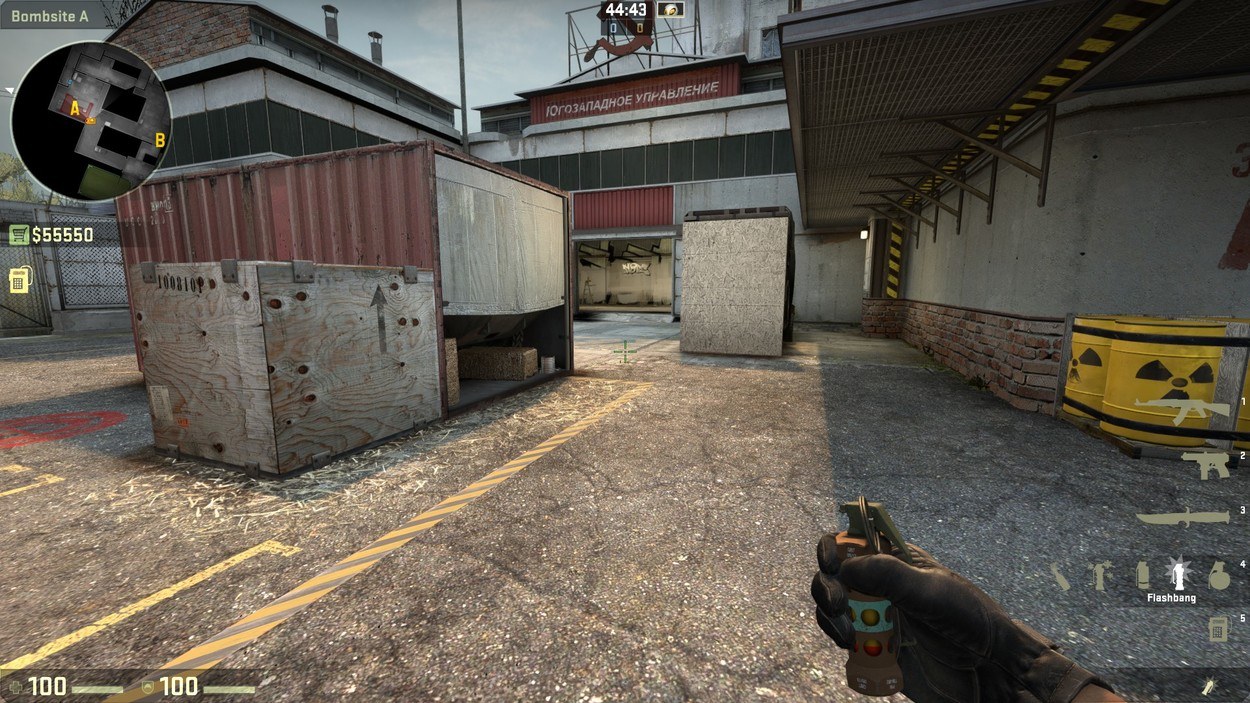
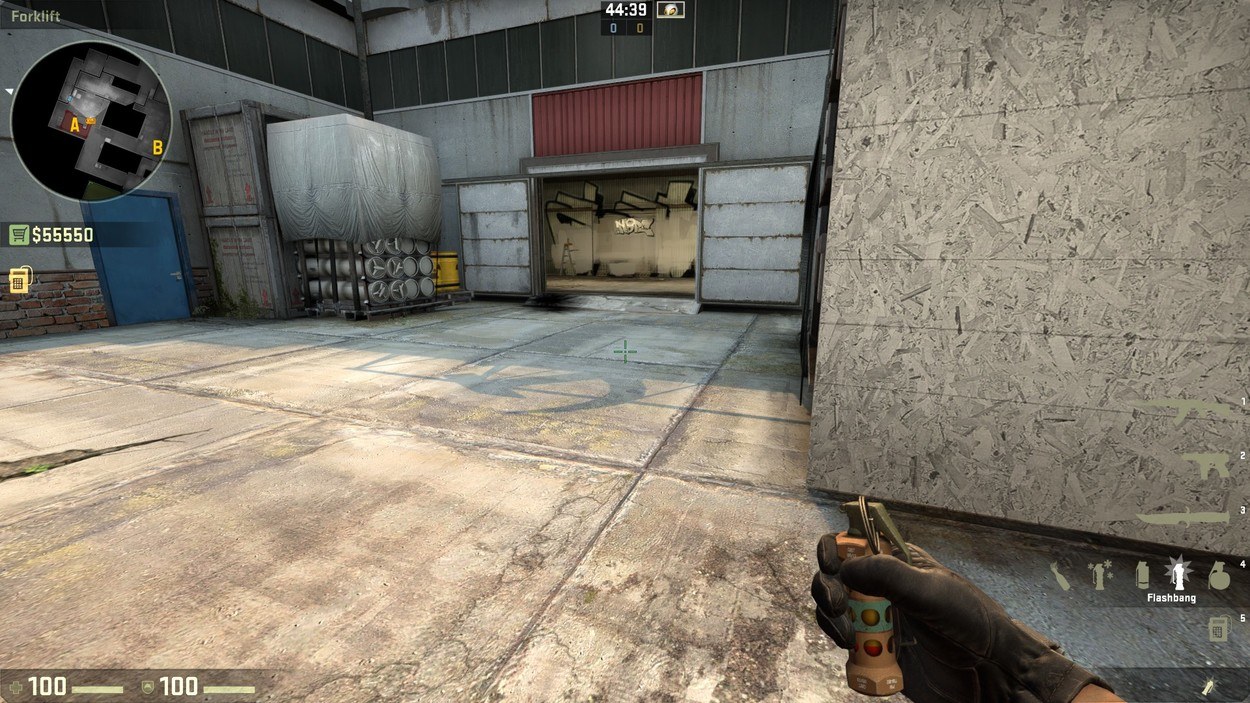
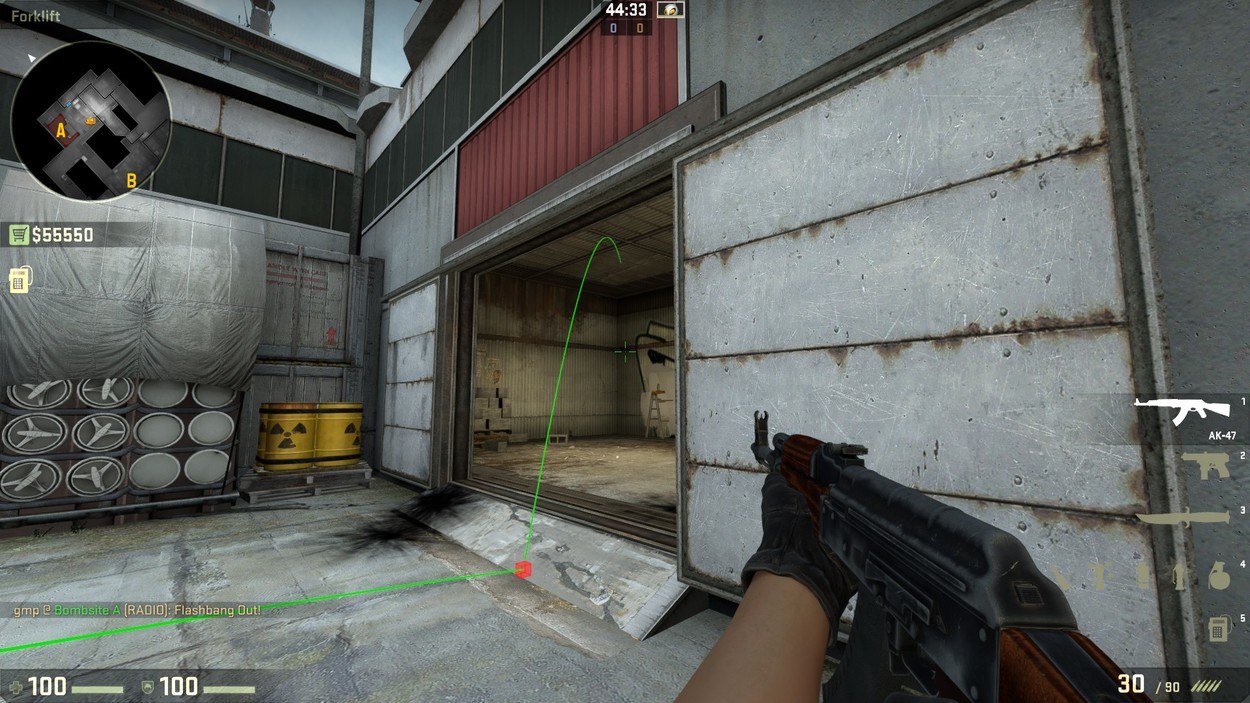
Left: Area to throw from. Right: Exact point of throw (beware that this is a running throw and will need a small run up.) Below: Impact area of flash.
Popflash 4: A Site (Post-plant T)
Post-plants are hard to evaluate as a general term and are better served for analysis on case by case basis. This isn't the case when it comes to post-plant grenades, as they are often useful to a team regardless of the post-plant scenario. Of course there will be exceptions to this, but as a general rule this is a very solid flash for getting you out of a tough spot. It flies for quite a long time after it clears the box, making it less effective than it would otherwise be, but I played around for quite a while before concluding that a true popflash from this position is far too hard to pull off in the heat of the moment. This flash will blind enemies running onto the bombsite, making timing far more crucial than the placement of it, as if an enemy is caught out with this flash, they truly are caught with their pants down well away from any substantial cover.
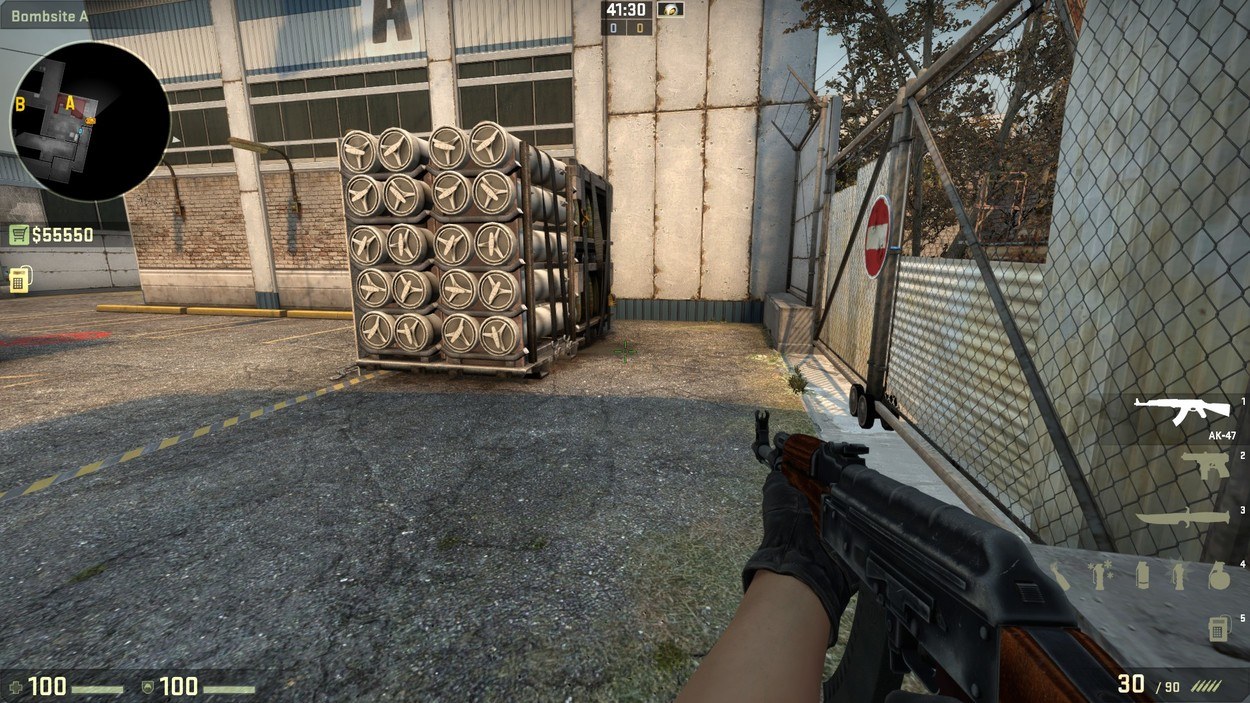
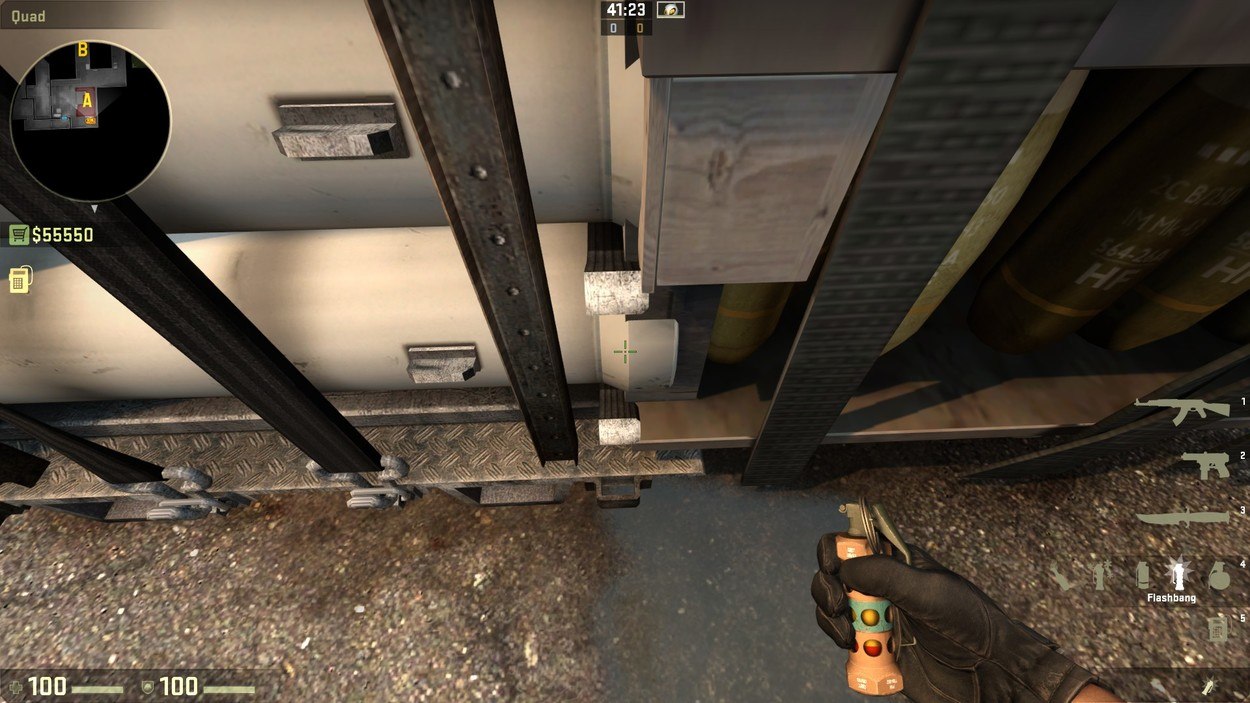
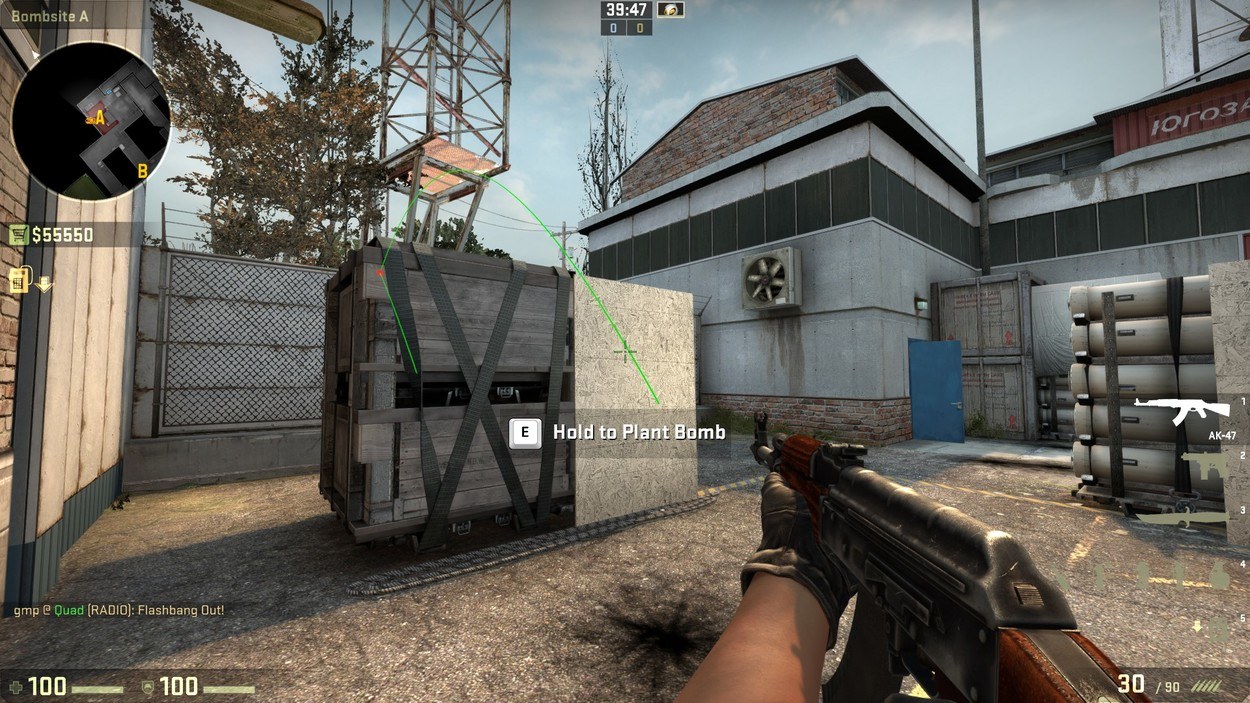
Left: Area to throw from. Right: Exact point of throw. Below: Area of impact.
Popflash 5: B Main (CT)
One for getting yourself out of a very deep hole, both figuratively and literally. This positioning is not one which a player should ideally take at round start, but I've died in this little crevice on B site more times than I'd like to admit. This flash will blind all players staring at the B main entrance and is very effective for an escape mechanism rather than an offensive maneuver. It bounces right away, which will be a giveaway that some sort of grenade is coming, but one with only one bounce is not often expected. It's thrown from the hole in B site but has to be thrown with a turned back, which is obviously not an ideal stance.
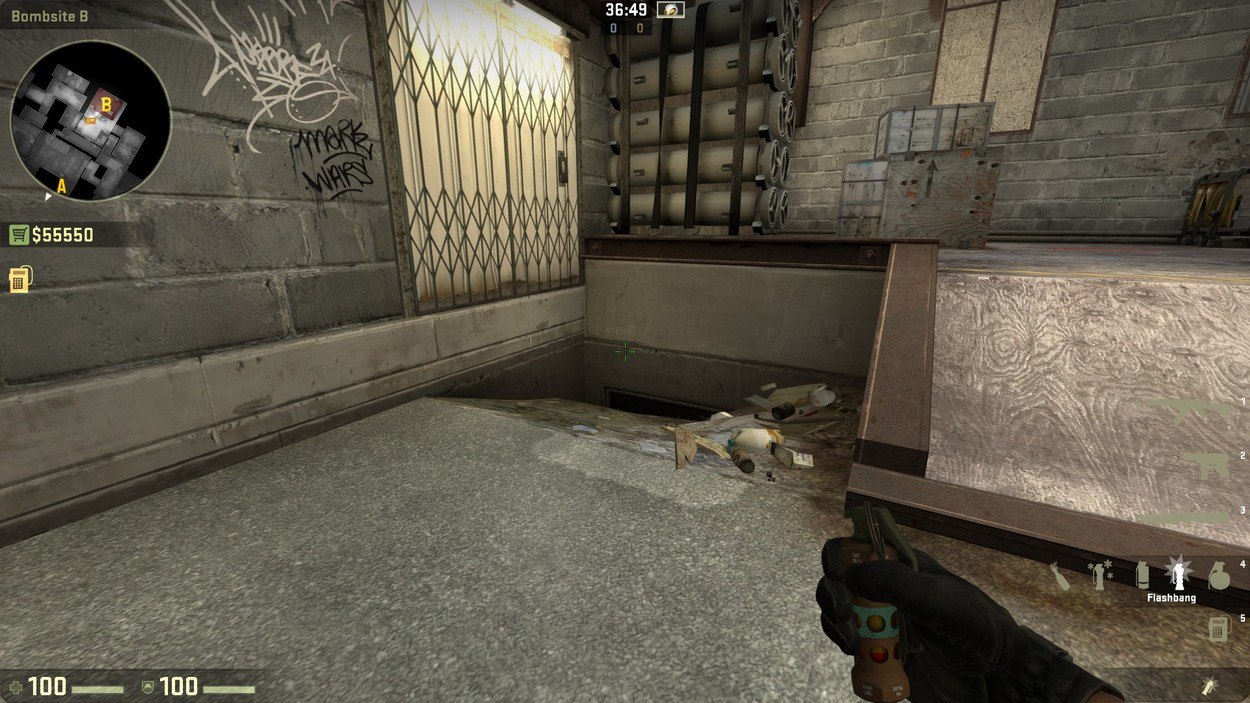
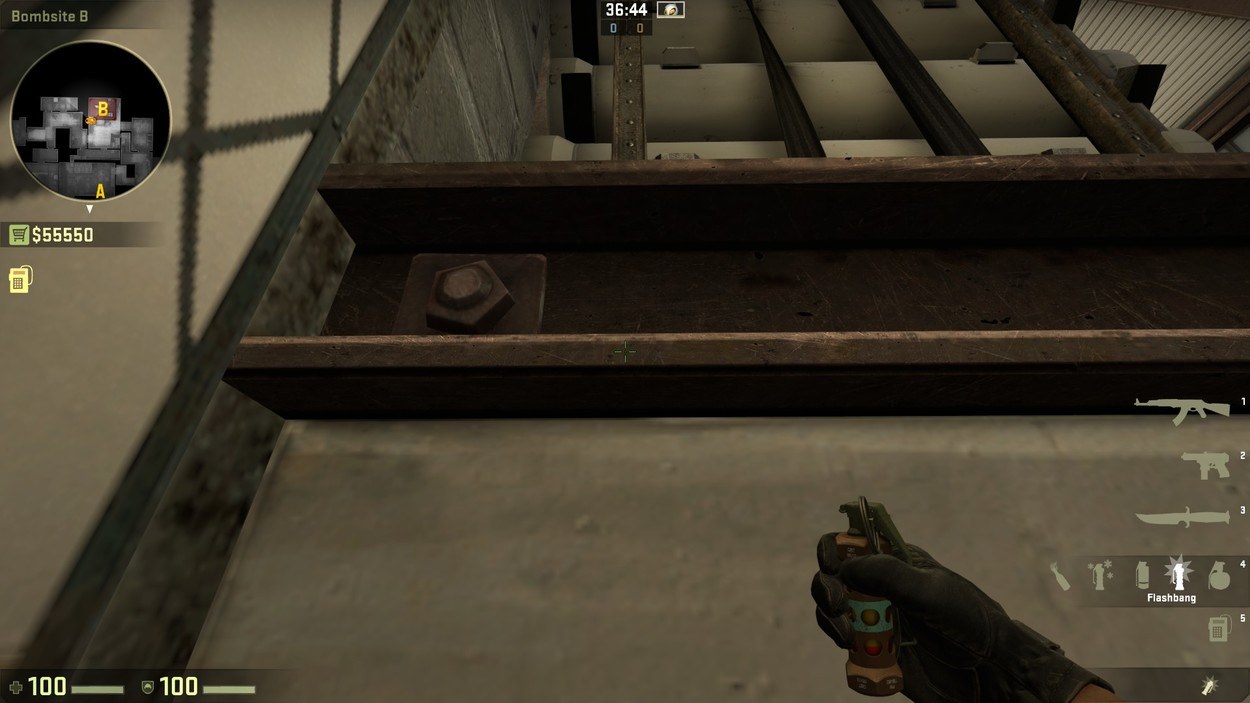
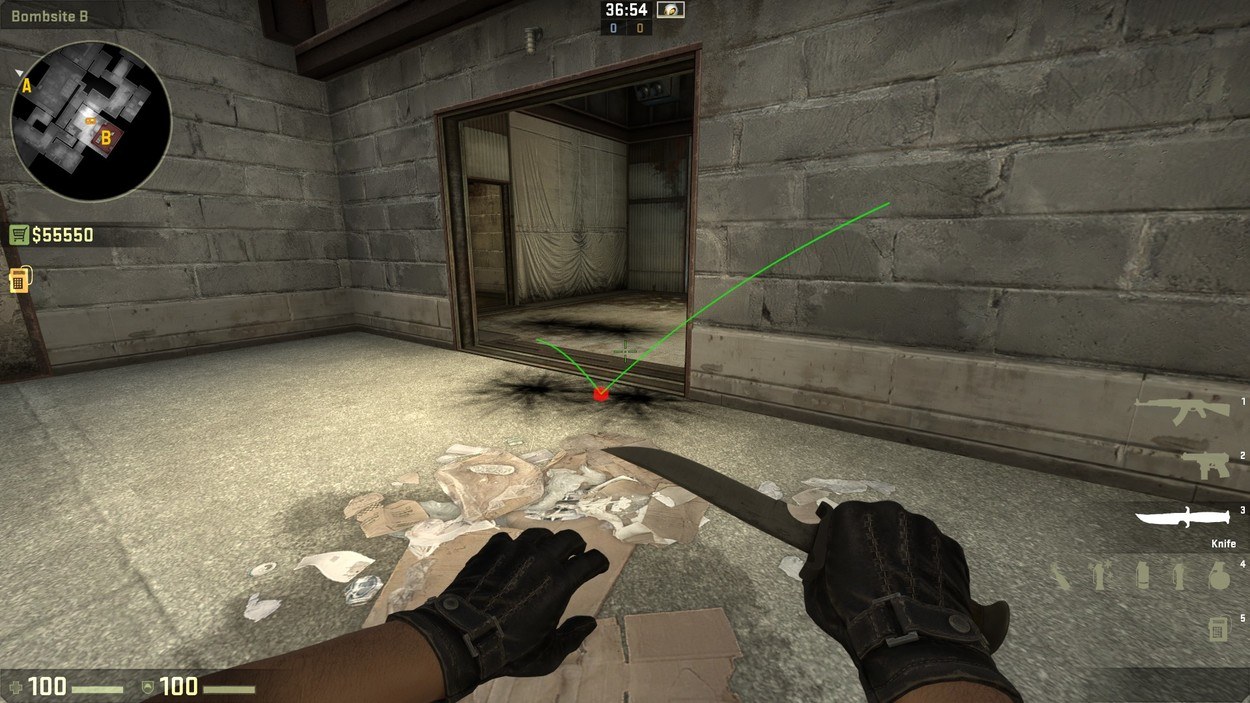
Left: Area to throw from. Right: Exact point of throw. Below: Area of impact.
Situationally, popflashes are extremely powerful and can give you the edge in even the most awkward situations and positions. They can catch enemies off-guard while simultaneously giving you a huge advantage in the round, albeit over a very short period of time. I hope you've learned something from this guide and good luck popflashing!
Get your own AKRacing Chair here and support our players, all profit goes towards the teams!